How to add buttons and lists in message flows
Interactive messages provide users with a simpler, more efficient way to interact with your business on WhatsApp. They achieve significantly higher response rates and conversions c…
Interactive messages provide users with a simpler, more efficient way to interact with your business on WhatsApp. They achieve significantly higher response rates and conversions compared to traditional text-based messages.
ChatDaddy supports two types of interactive messages:
-
Buttons: Quick-select options with up to 3 buttons.
-
Lists: A menu-style format with up to 10 options.
❗ Note: Important
- You can only use EITHER buttons or lists in a single message.
- These features are available only for WhatsApp Business or WABA accounts.
- Without these accounts, messages will be sent as poll buttons.
1. Buttons
Buttons include up to 3 options, making it faster for users to choose from a menu when interacting with your business.
How to Add Buttons
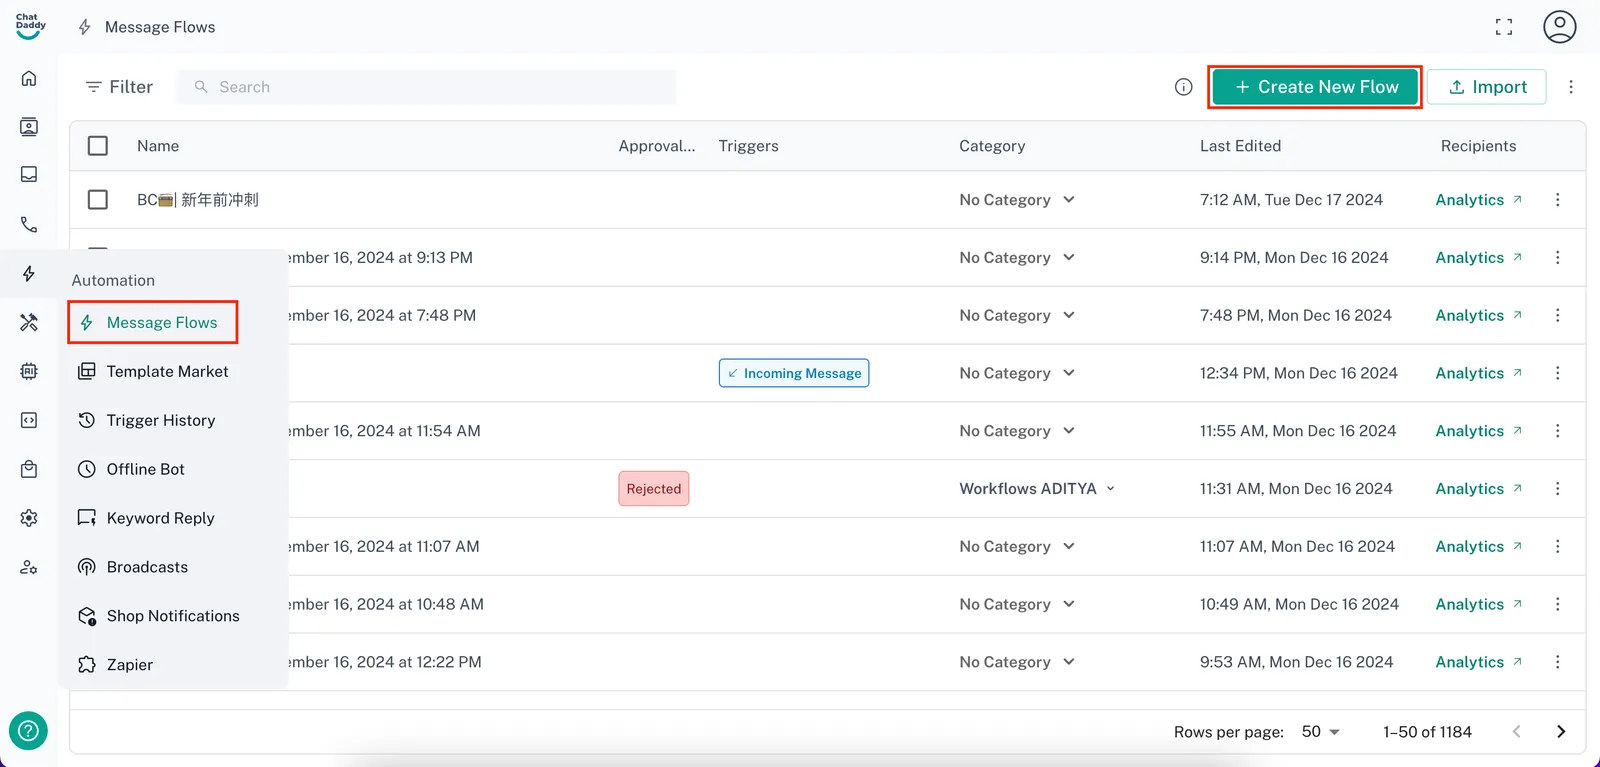
Step 1: Navigate to the Automation Section
-
Hover over the left-hand sidebar.
-
Go to “Message Flows” and click on “+ Create New Form”.
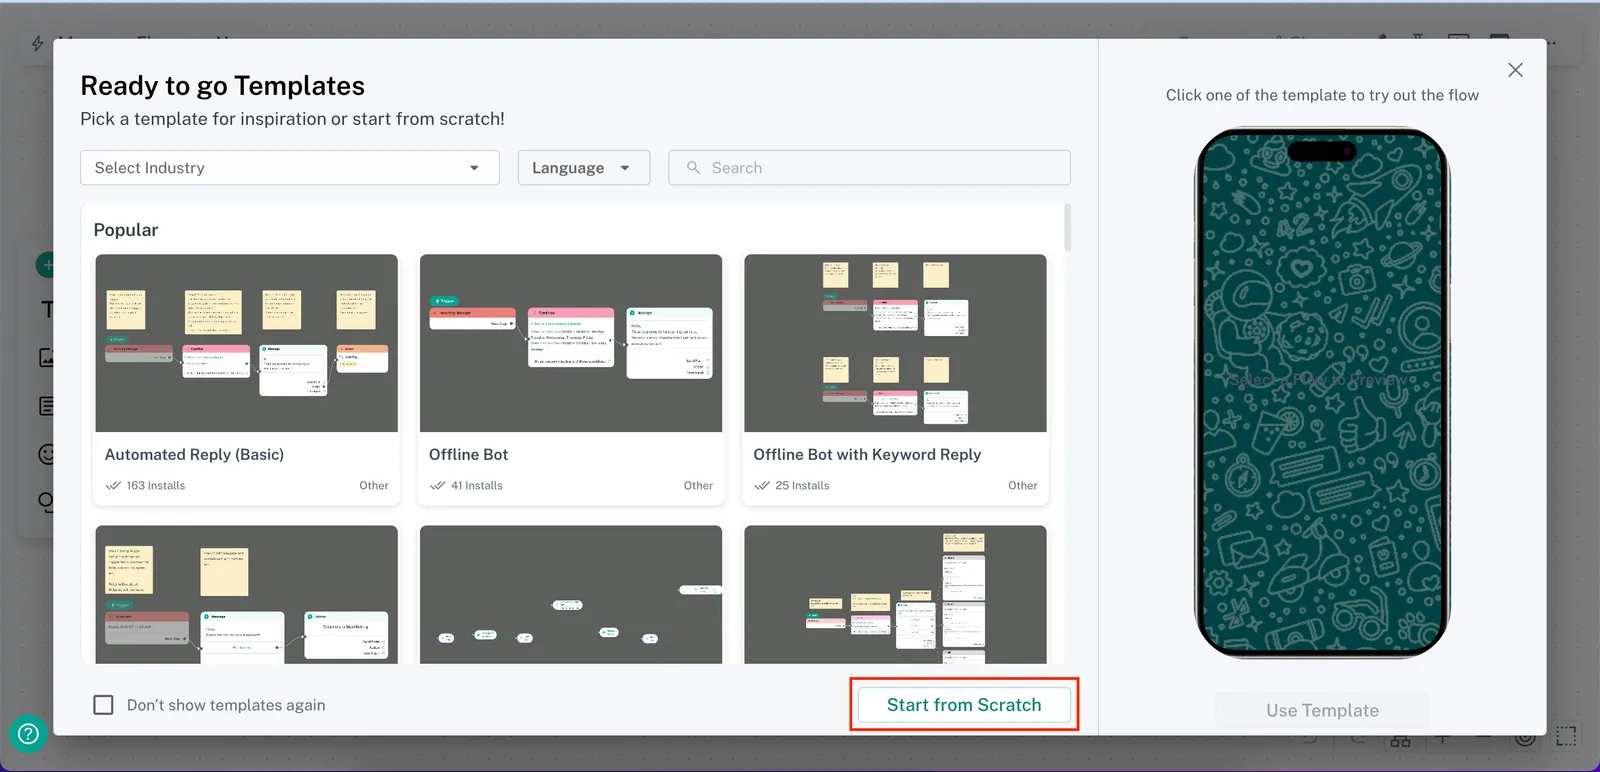
Step 2: Choose a Template or Start from Scratch
- Pick a pre-made template or click “Start from Scratch” to create your own.
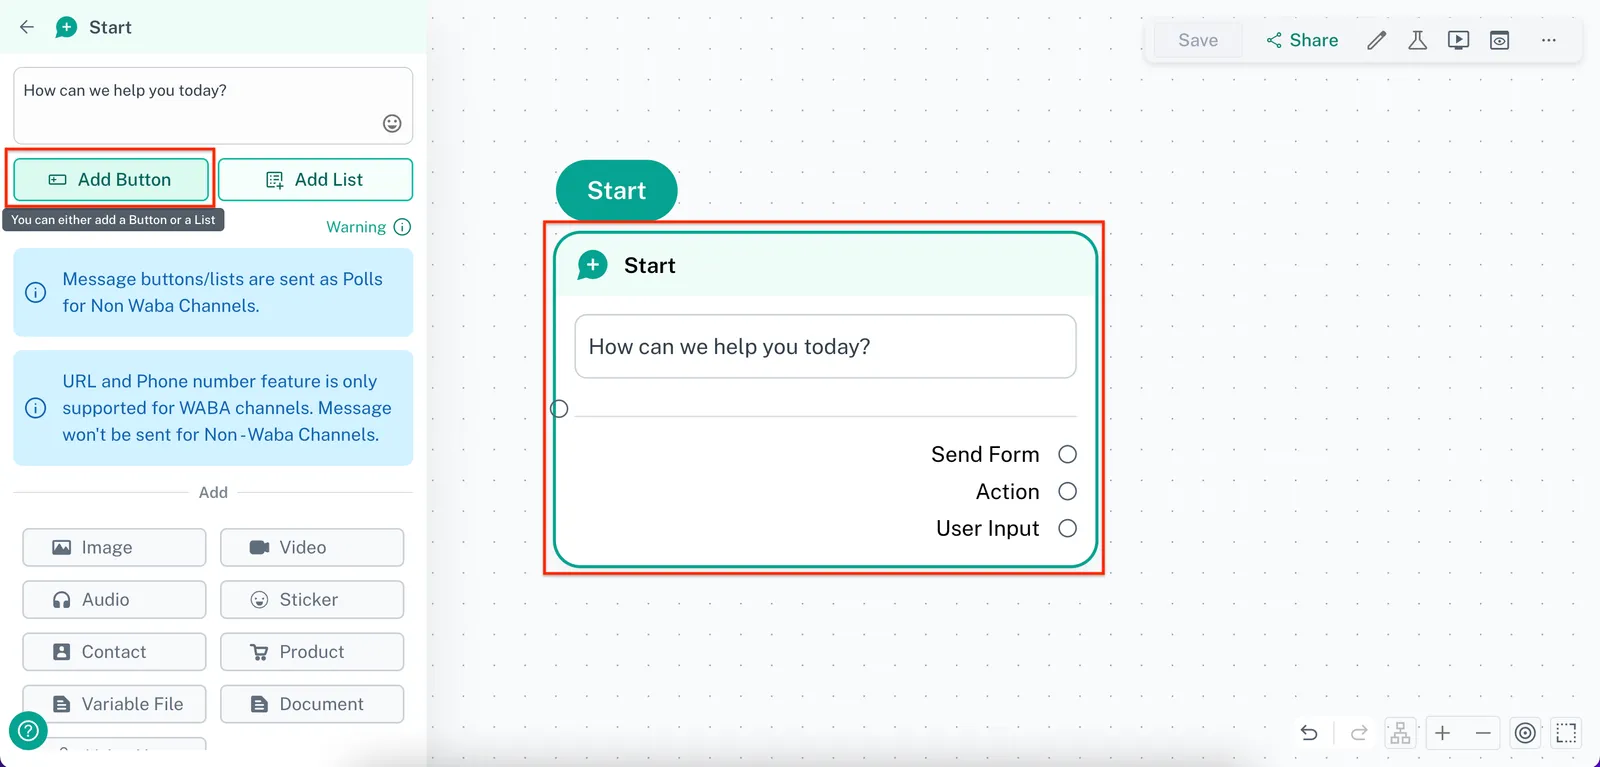
Step 3: Add Buttons to a Message
-
Click on the message where you want to add buttons.
-
Select “Add Button”.
❗ Note: Note: You cannot send a message containing buttons **alone - **you must include some message content.
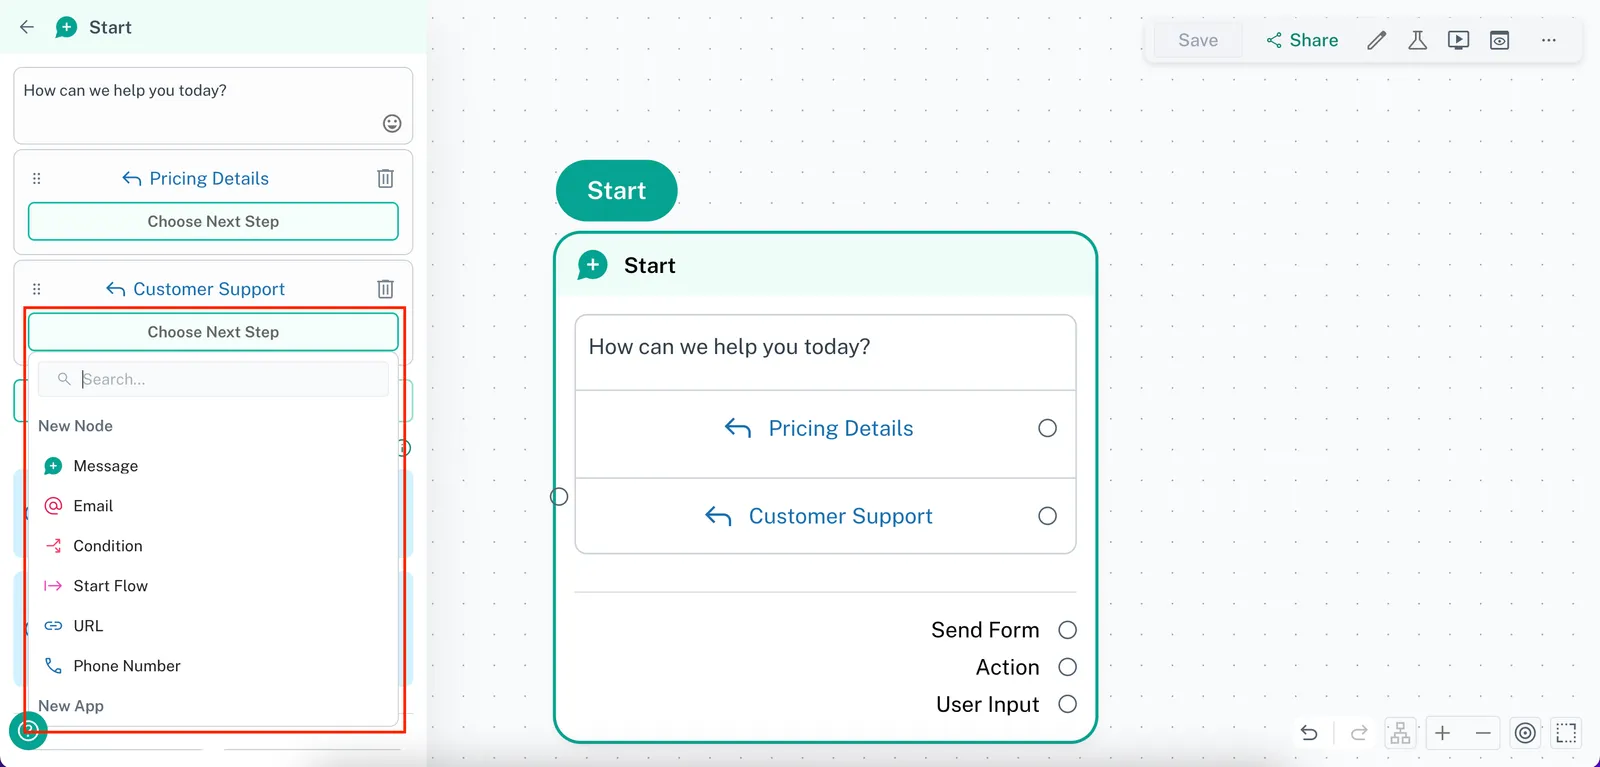
Step 4: Set Up Button Content and Actions
-
Define the text (less than 20 characters) for each button.
-
Configure the action that occurs when a user clicks the button.
❗ Note: The button text must be 20 characters or fewer.
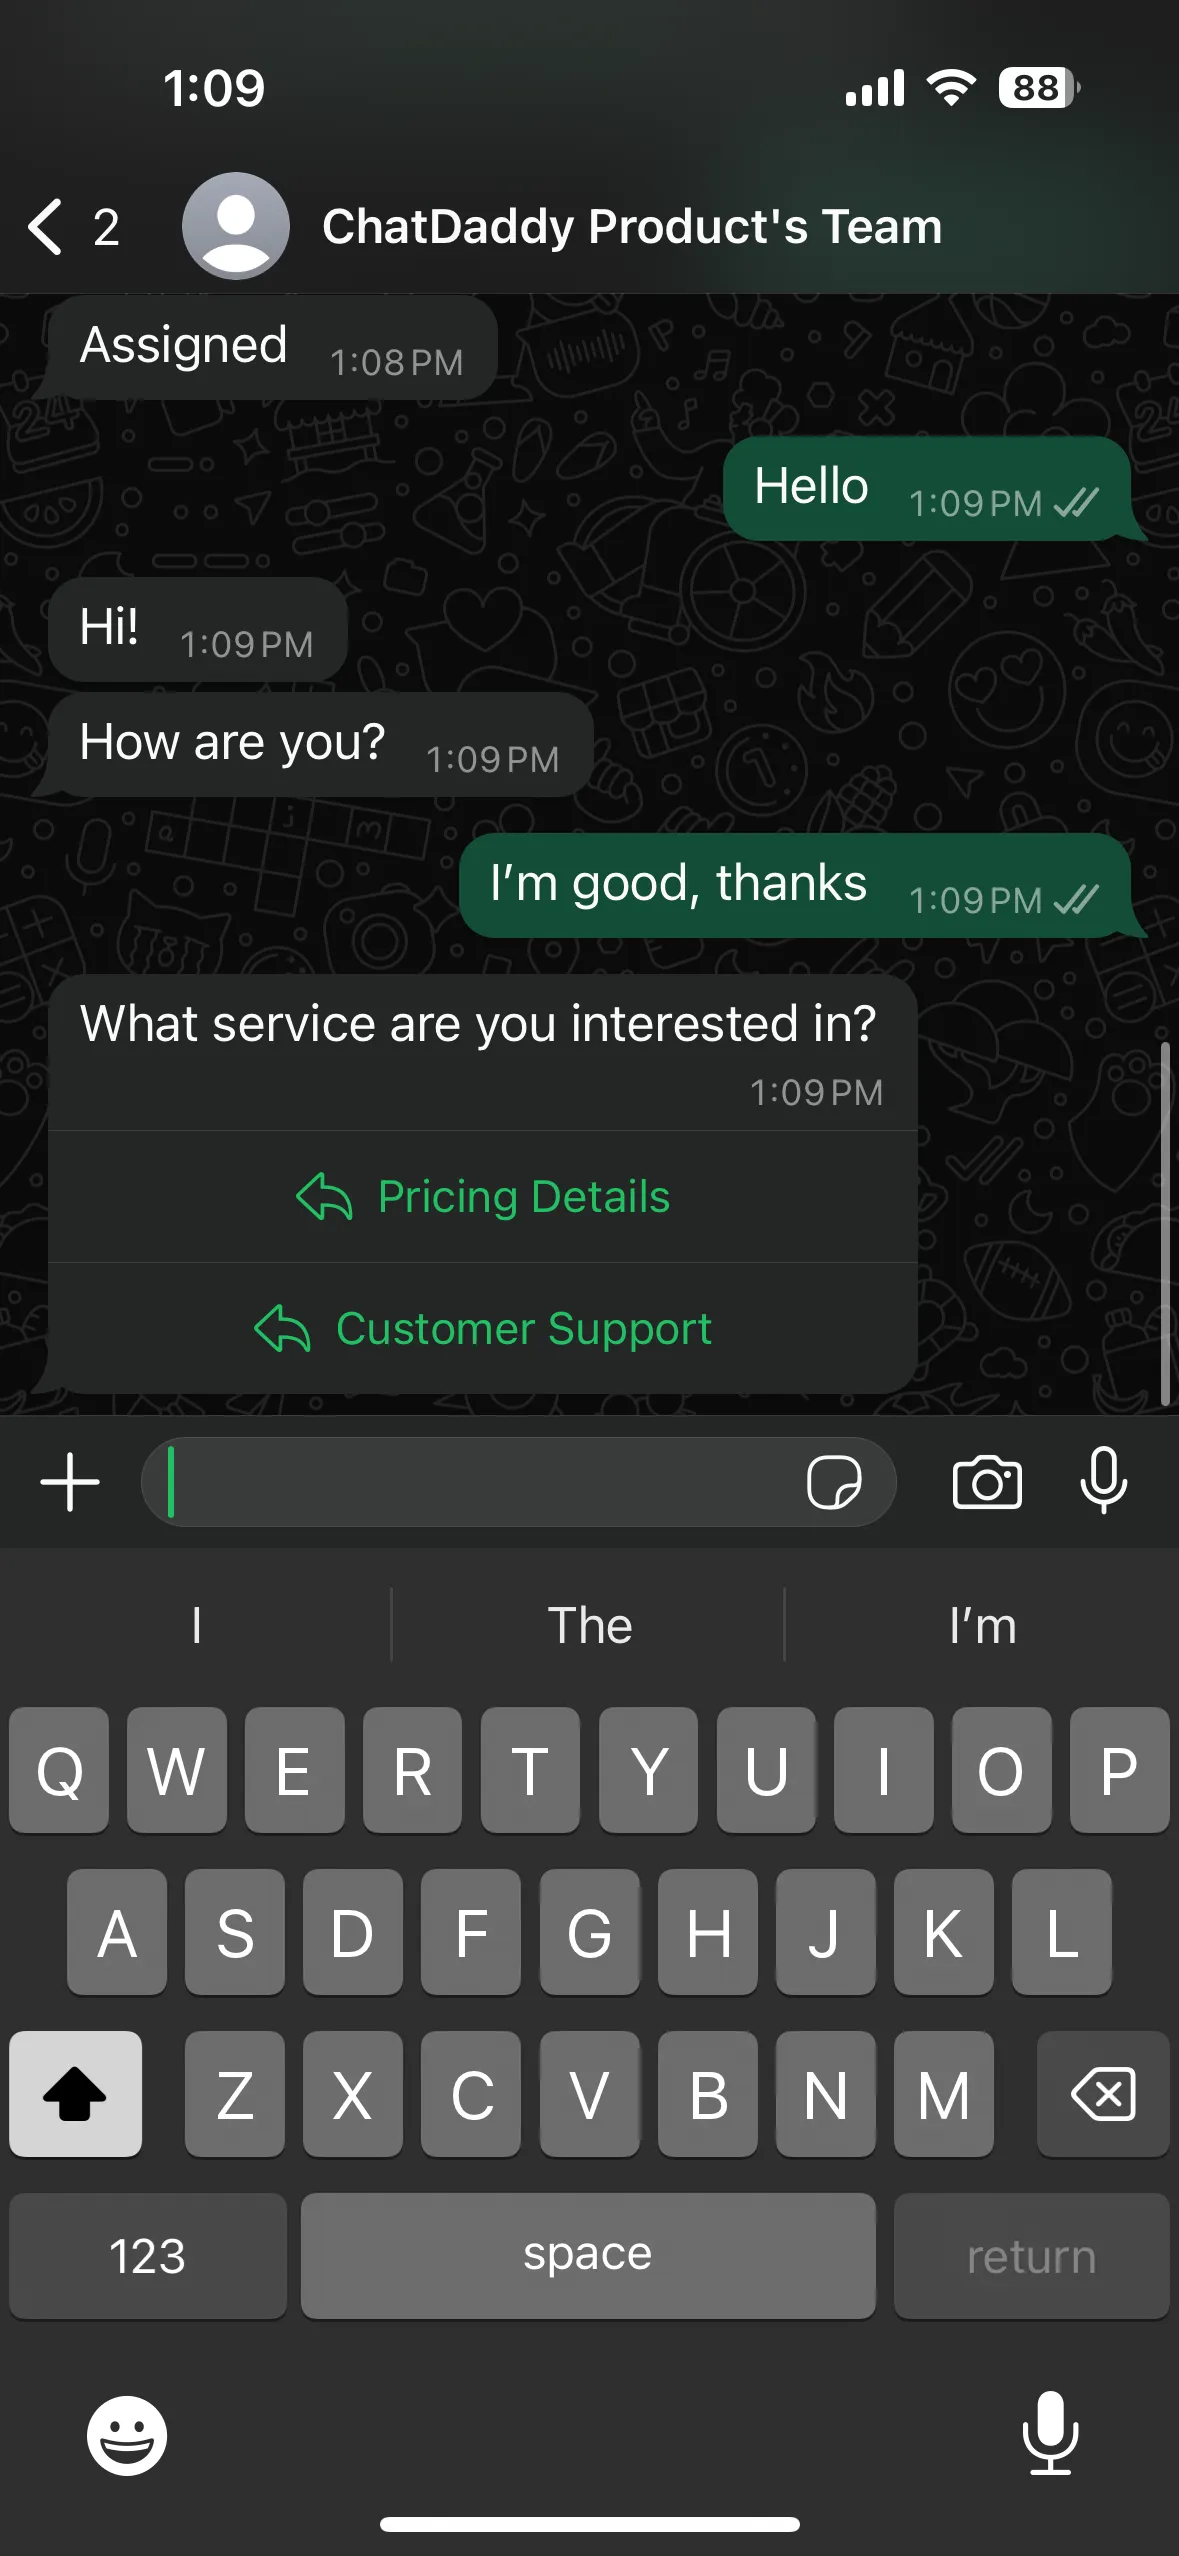
Example of Buttons on WhatsApp
2. Lists
Lists include a menu of up to 10 options, offering a clean and consistent way for users to select an item when interacting with your business.
How to Add Lists
Step 1: Navigate to the Automation Section
-
Hover over the left-hand sidebar.
-
Go to “Message Flows” and click on “+ Create New Form”.
Step 2: Choose a Template or Start from Scratch
- Pick a pre-made template or click “Start from Scratch” to create your own.
Step 3: Add Lists to a Message
-
Click on the message where you want to add a list.
-
Select “Add List” and give it a name.
❗ Note: Note: You cannot send a message containing a list **alone - **you must include some message content.
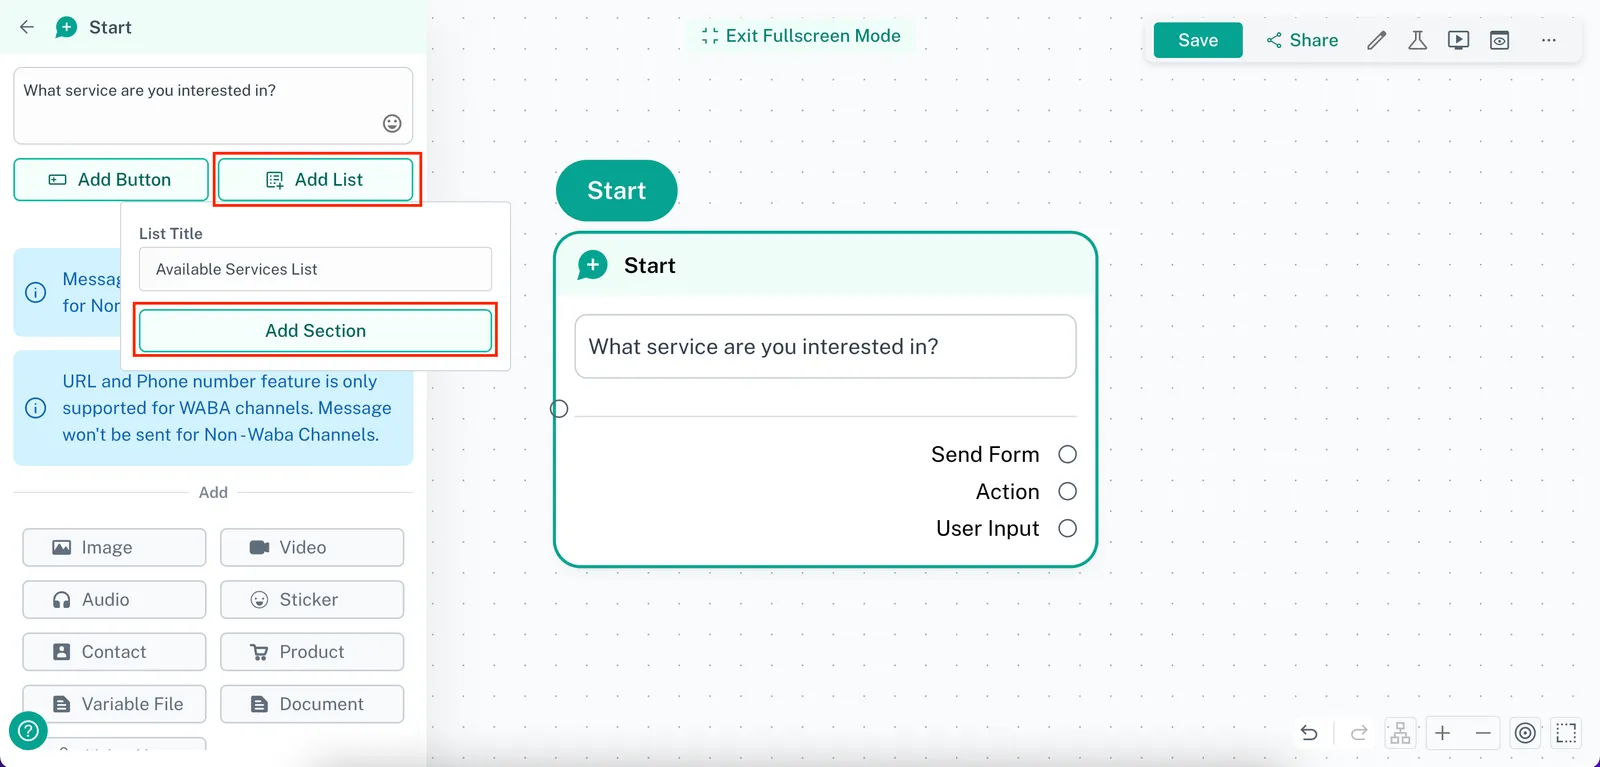
Step 4: Add Sections and Options
- Configure sections and add options relevant to your use case.
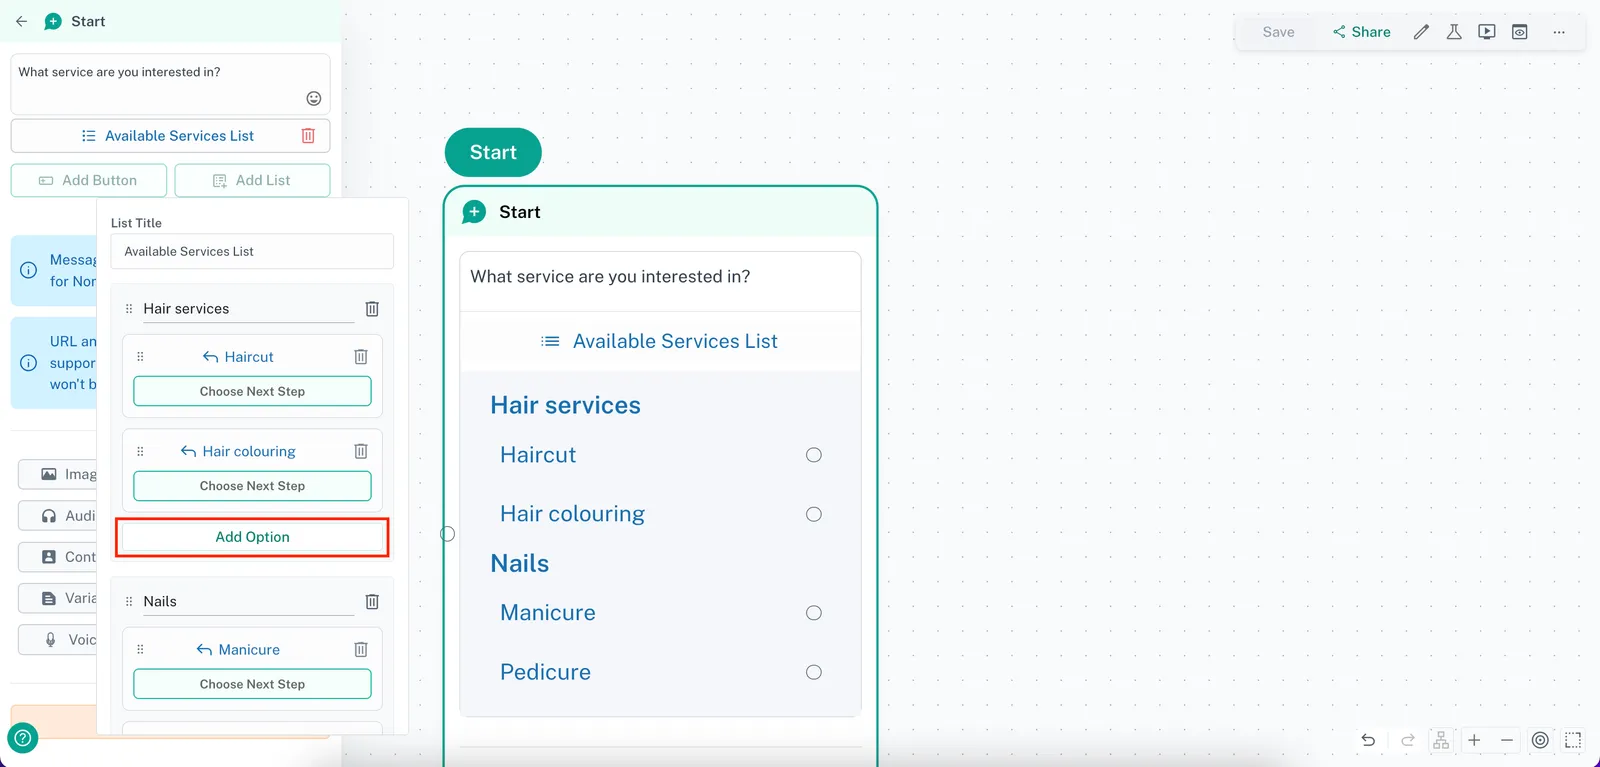
- Click on “Choose Next Step” to set up actions for each list item.
❗ Note: Make sure you fill out all options and delete any empty ones. Empty options will cause the message to fail to send.
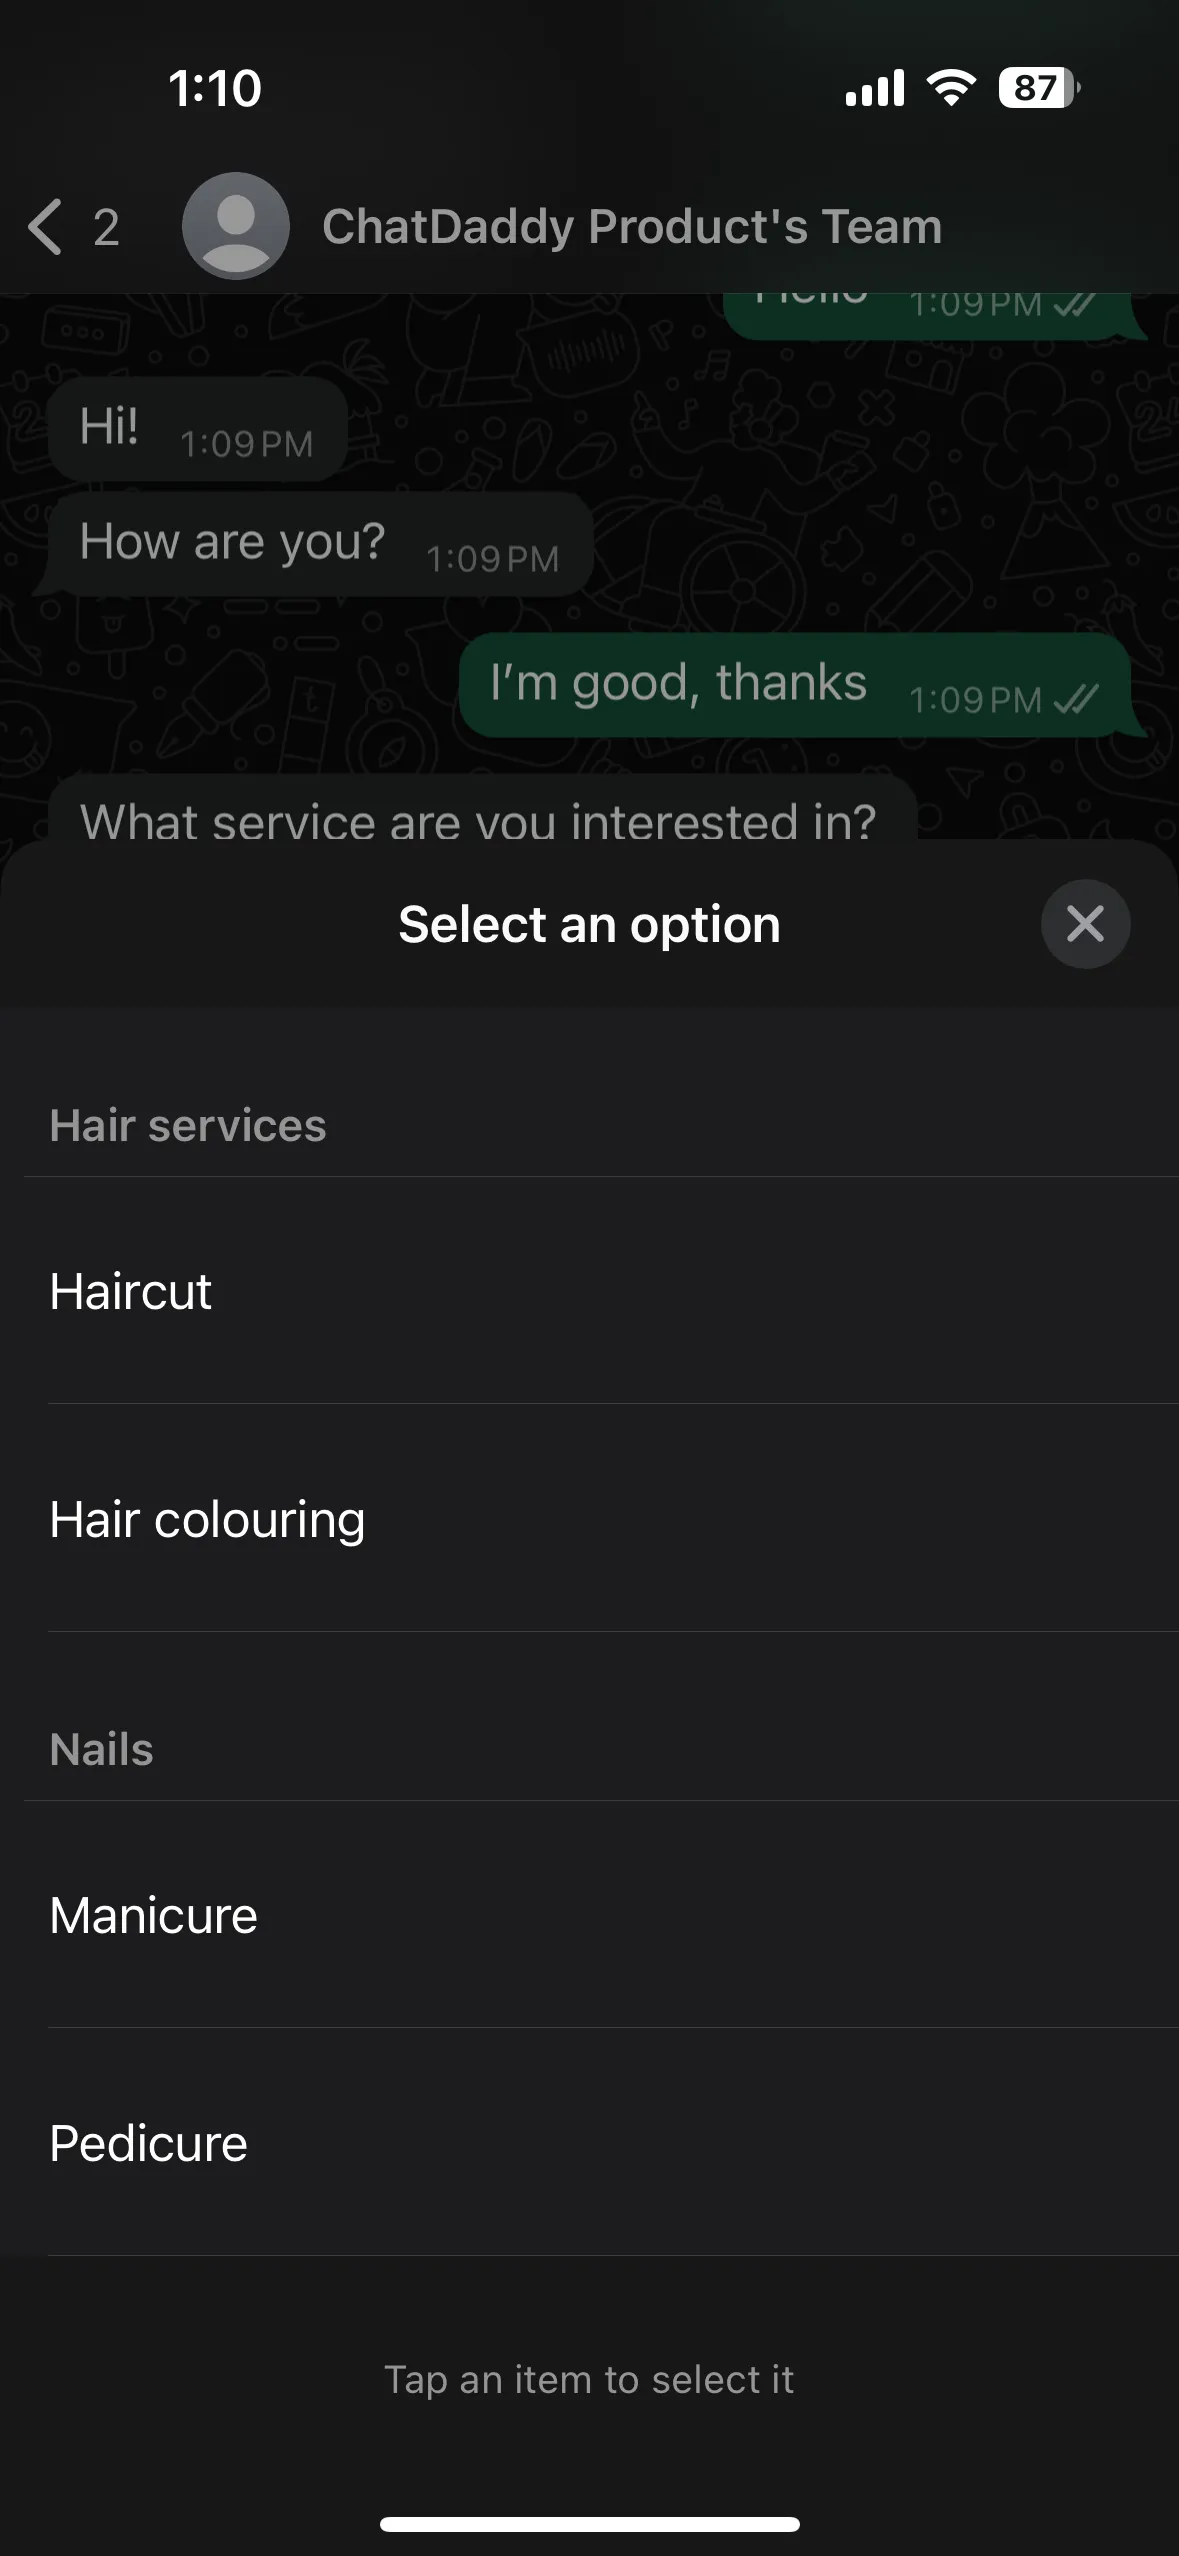
Example of Lists on WhatsApp

By following these steps, you can quickly integrate interactive messages—either buttons or lists—into your workflows to enhance customer engagement and response rates!