How to install Shopify
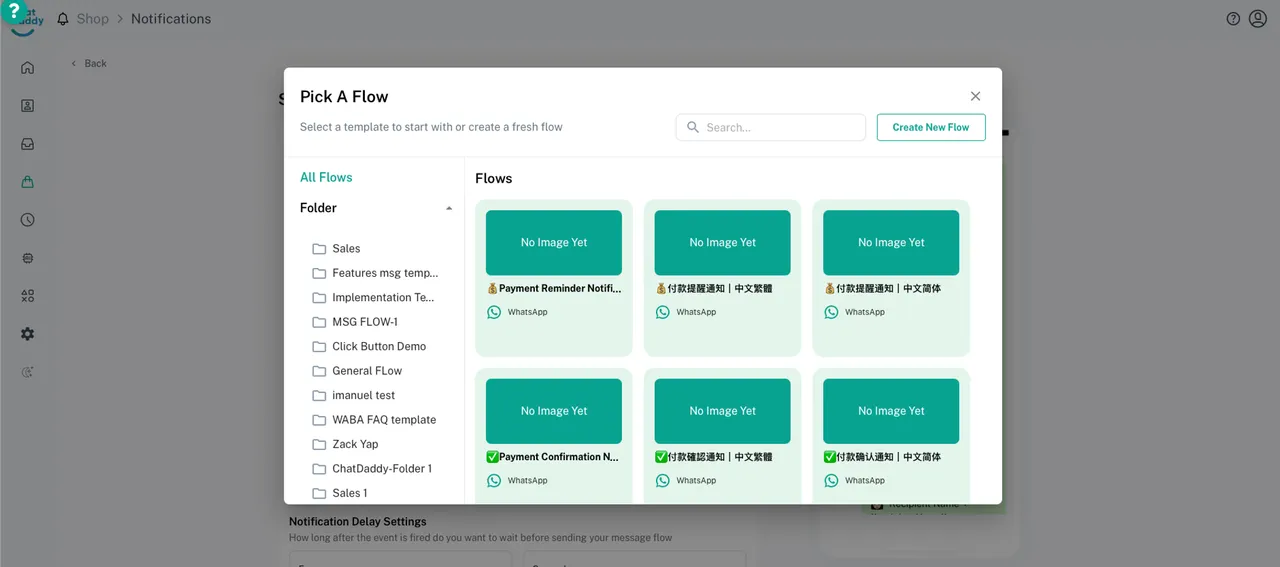
Video Hover your cursor over the Navigation Bar, hover over to Shop and click on ”Notification”. When you are at the panel click on ”+New Notifications”. !Image Click on「Shopify」an…
Video Tutorial
Step 1:
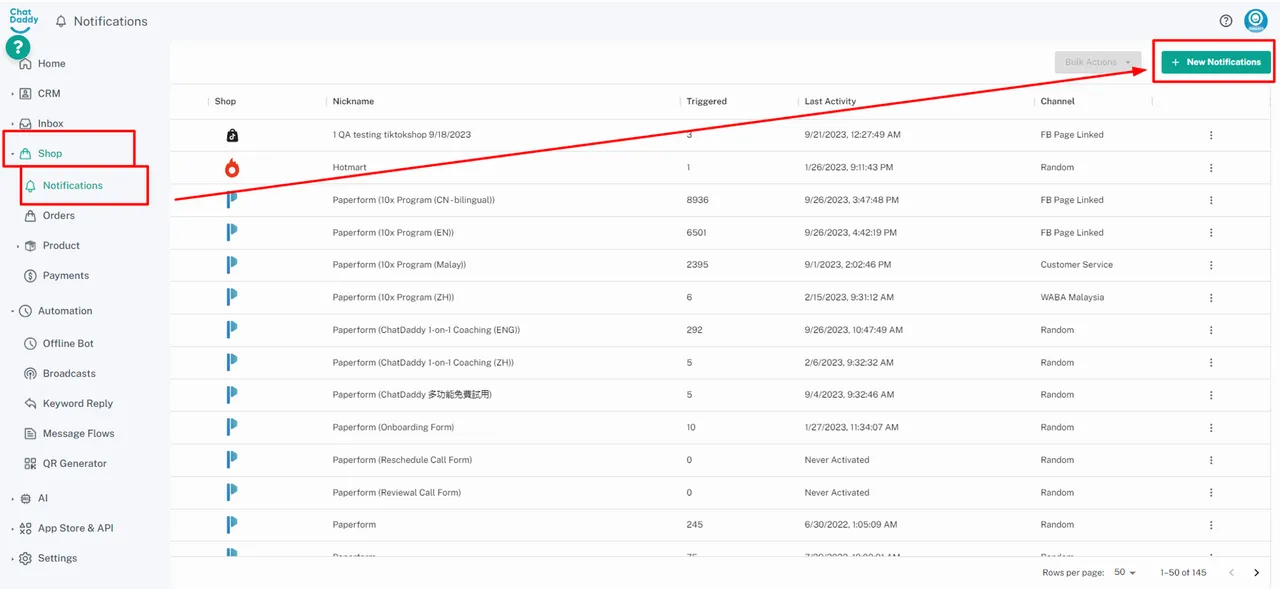
Hover your cursor over the Navigation Bar, hover over to Shop and click on ”Notification”.
When you are at the panel click on ”+New Notifications”.
Step 2:
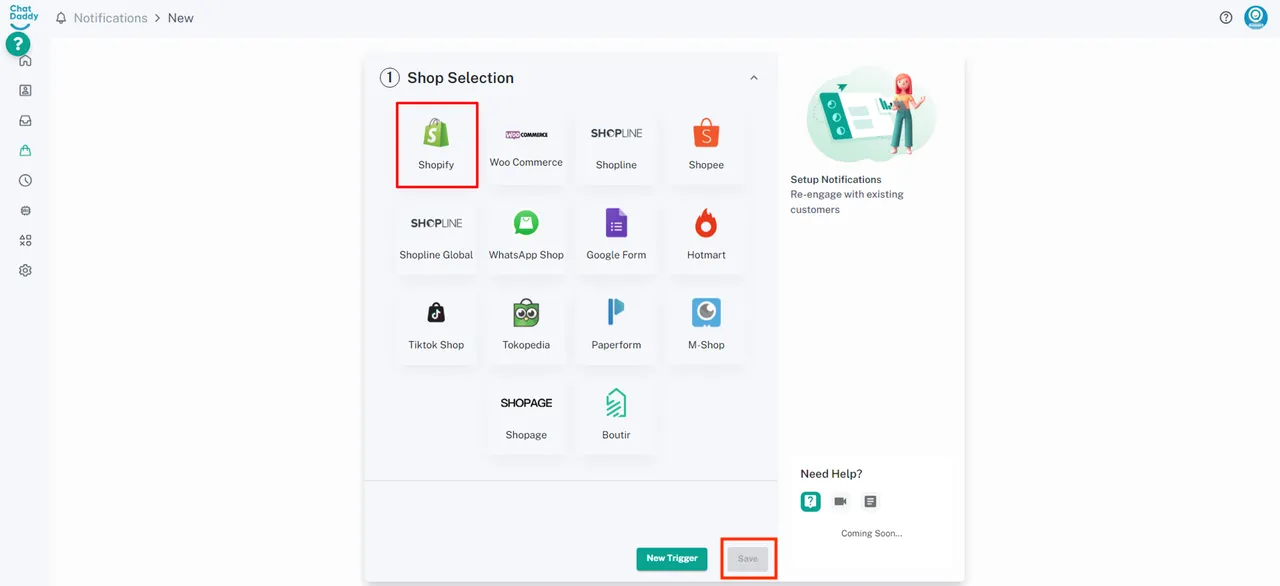
Click on「Shopify」and then select your “Default Country code, then click 「Save」
Step 3:
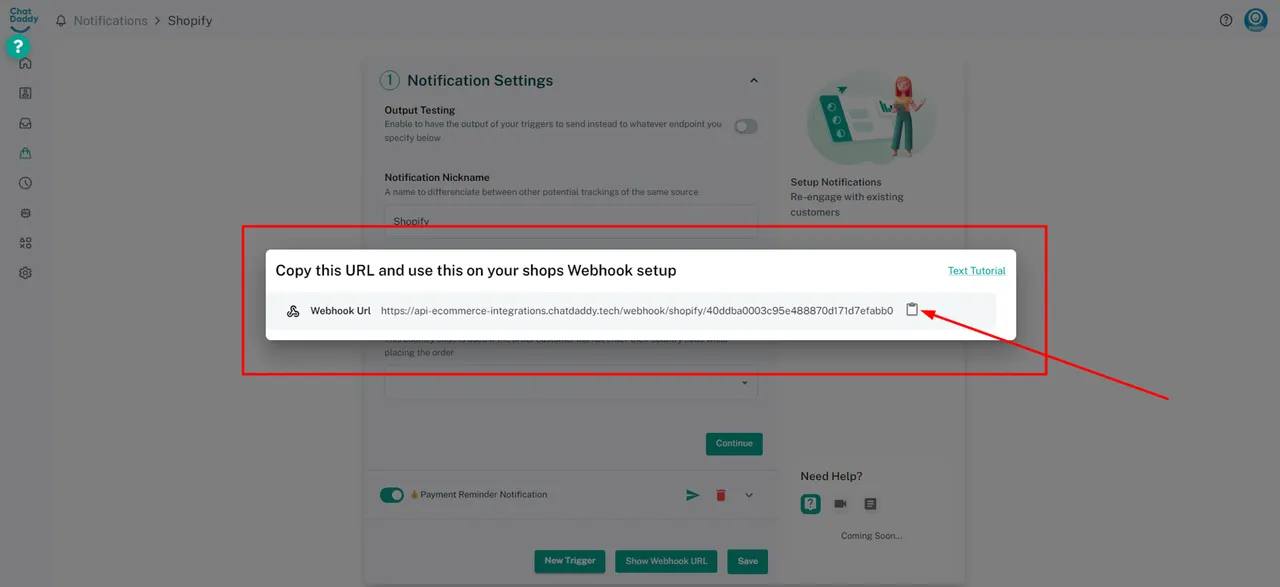
A Webhook URL will be generated, copy this Webhook URL.
Step 4:
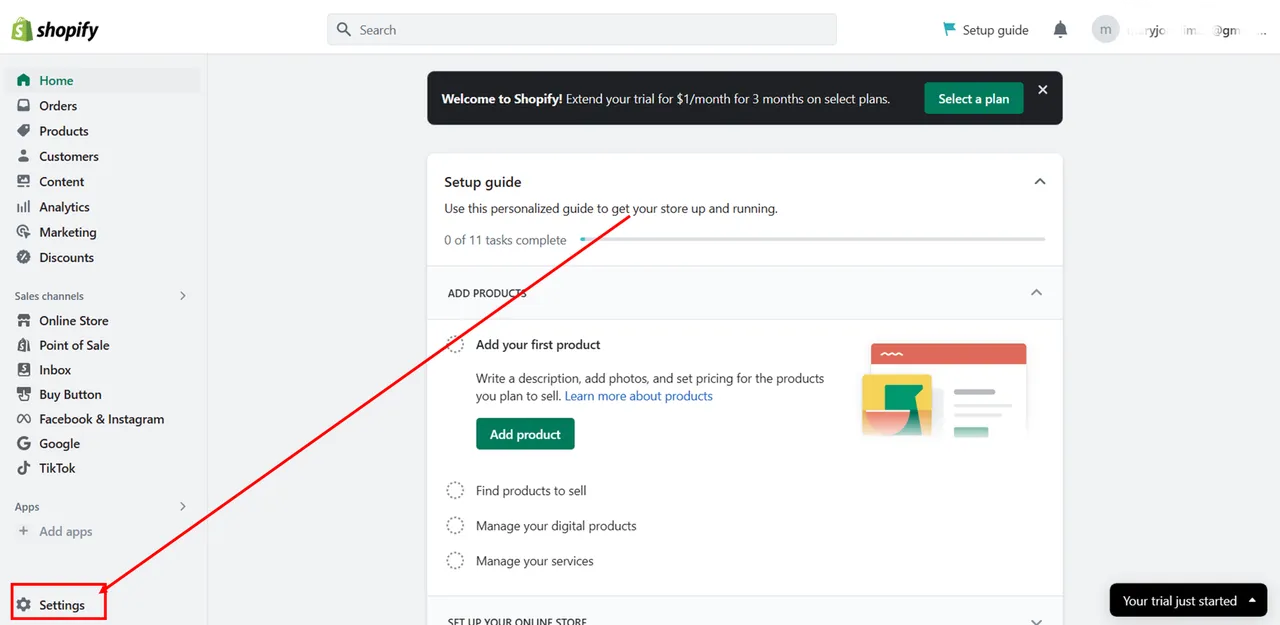
Head to your Shopify admin panel and click settings
Step 5:
There will be a notification panel that you may click
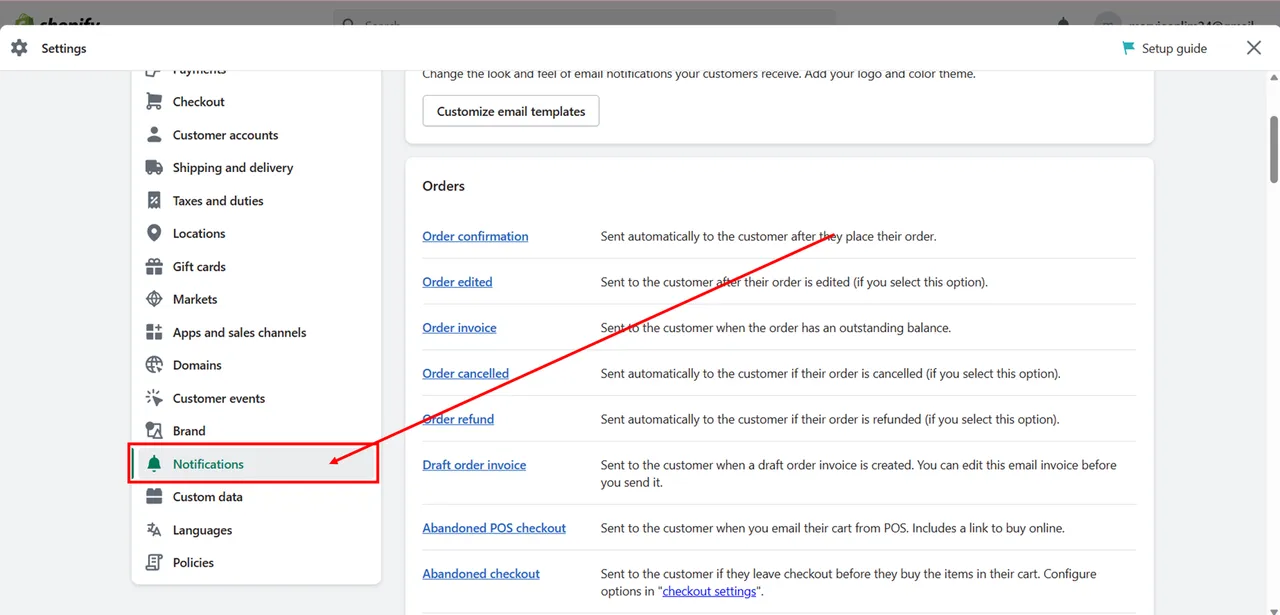
Step 6:
After clicking notification, scroll down till you find the Webhook section
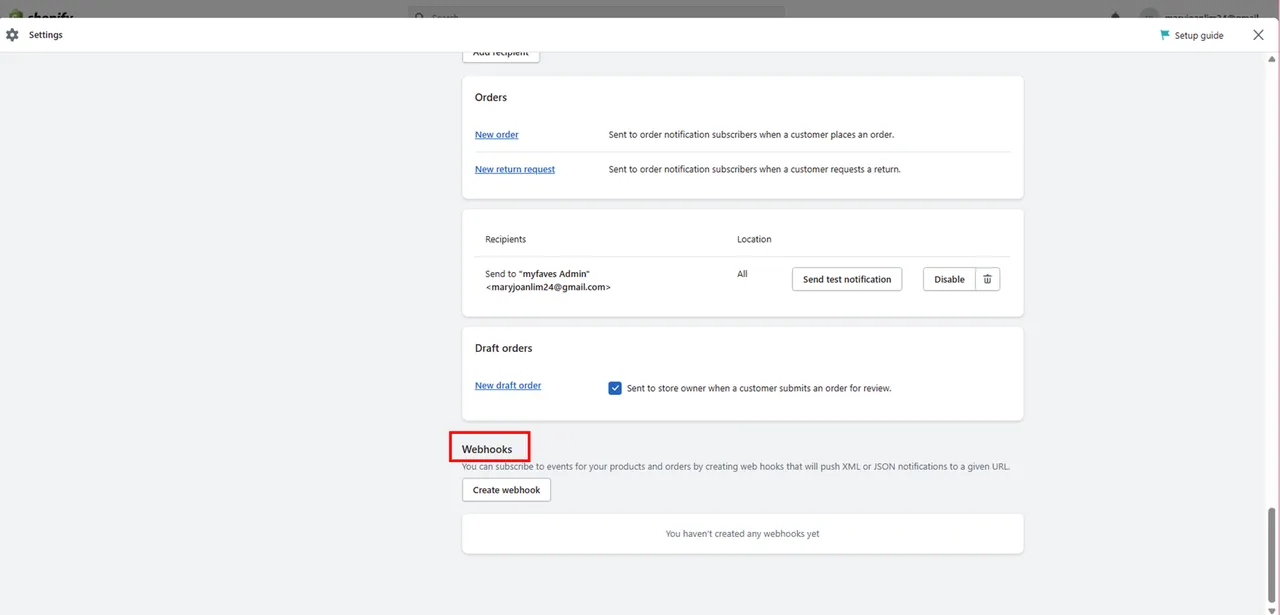
Step 7:
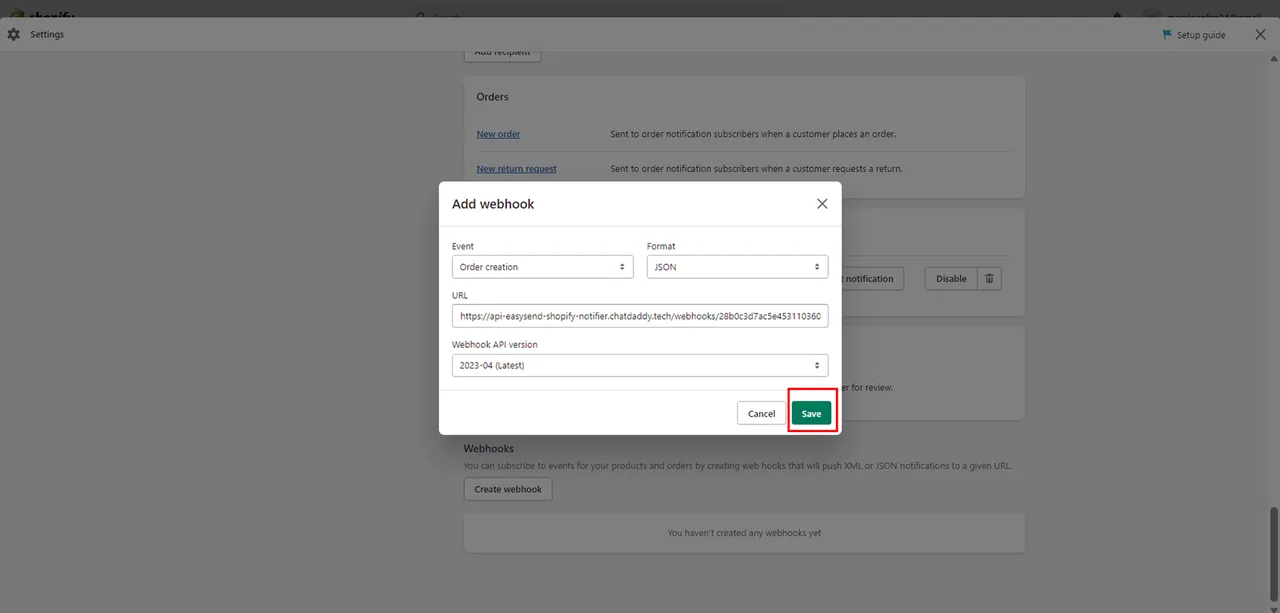
Click on「Create webhook」 ,and you will see a「Add webhook」 panel

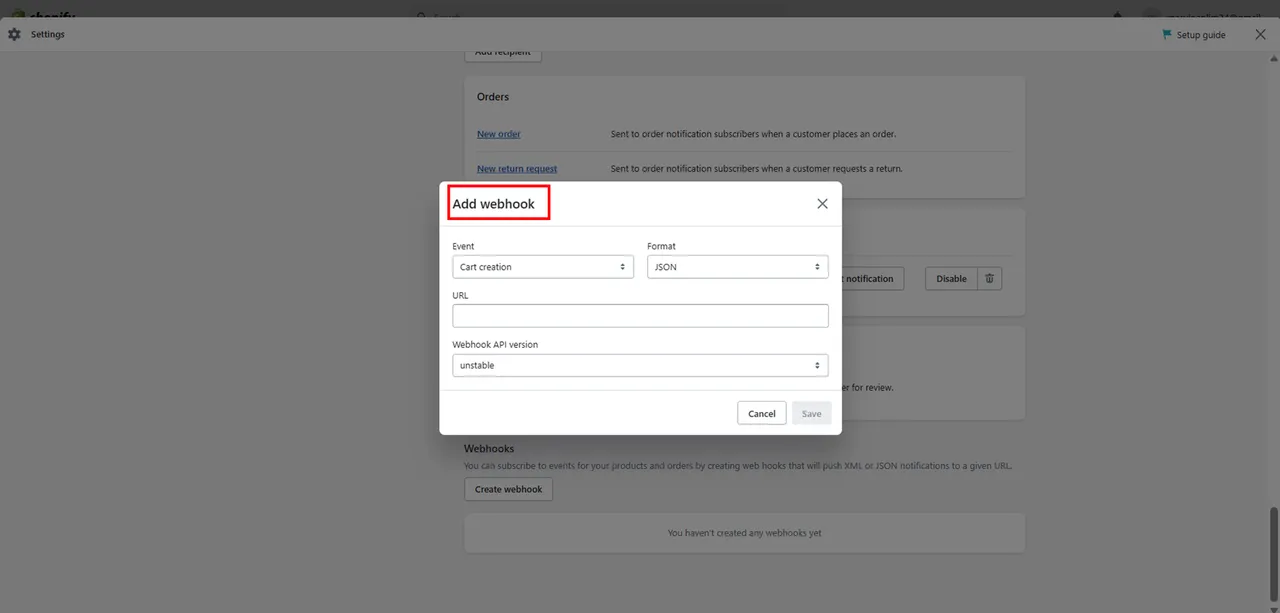
Step 8:
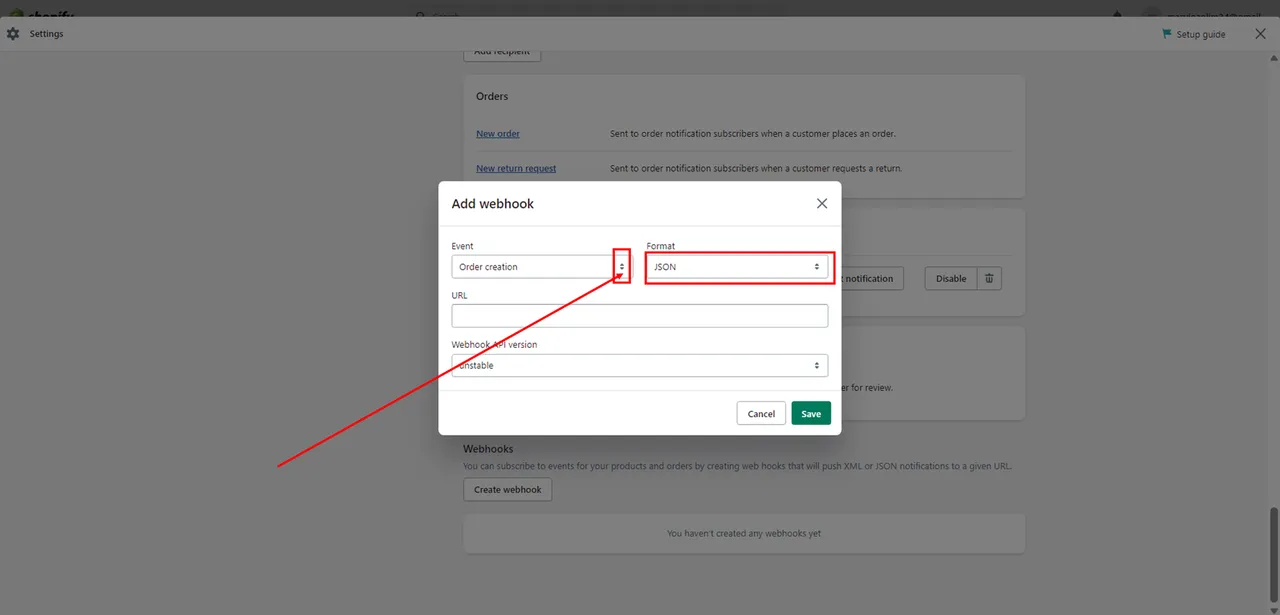
Click on「Event」dropdown bar, and add the condition that you would like us to capture at the meantime select 「JSON」for the「Format」dropdown panel
Note: We only support these 6 types of conditions at this moment
-
checkout creation
-
checkout update
-
order creation
-
order payment
-
order cancellation
-
order fulfillment
Step 9:
Paste the Webhook url from Step 3 into the URL column, at the webhook API version select the「 **Latest **」version,and click「Save」
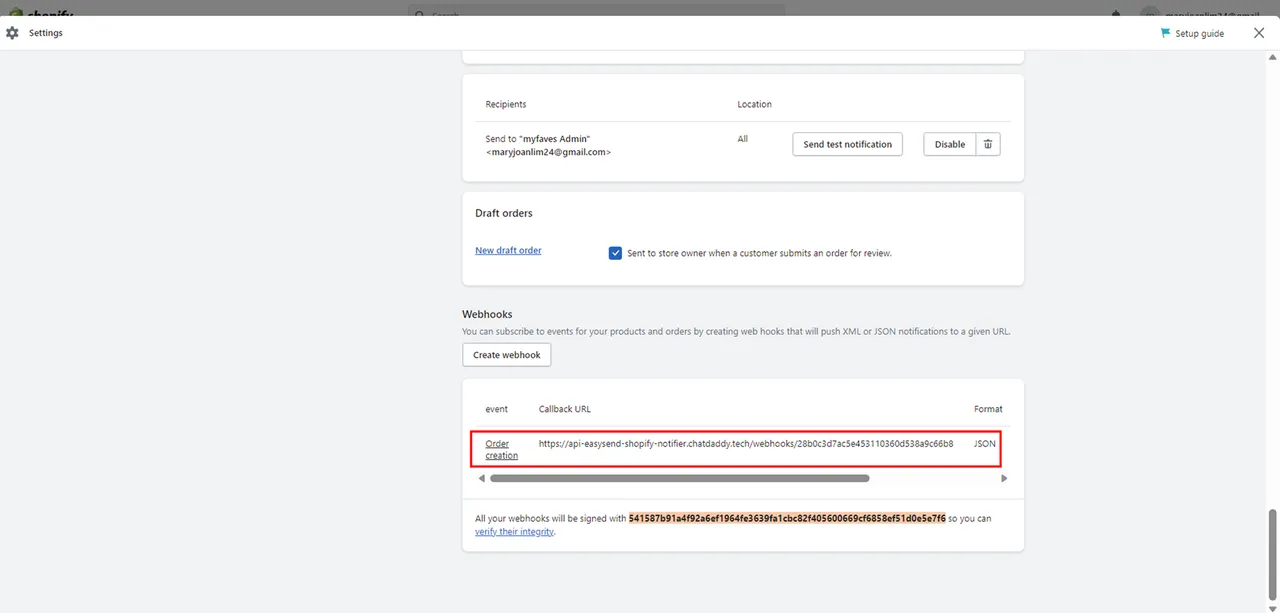
Step 10:
Here you will be able to see you have successfully attached the webhook
Note:If you would like different conditions to be captured you would have to redo Step 8 and 9 for each condition
Step 11:
You may select here to check your message template

Here is a list of variables you can use to personalise your message in message flow:
-
event
-
orderNumber
-
orderNumberFulfillment
-
orderCustomer
-
orderDate
-
orderCustomerPhone
-
orderCustomerEmail
-
orderCustomerAddress
-
billingCustomer
-
billingCustomerPhone
-
billingCustomerAddress
-
shippingMethod
-
recipientName
-
recipientEmail
-
recipientPhone
-
shippingAddress
-
shippingLines
-
total
-
currency
-
Product Details - Name, Quantity, Price:
{{#productDetails}}
{{name}} x {{quantity}}
{{/productDetails}}
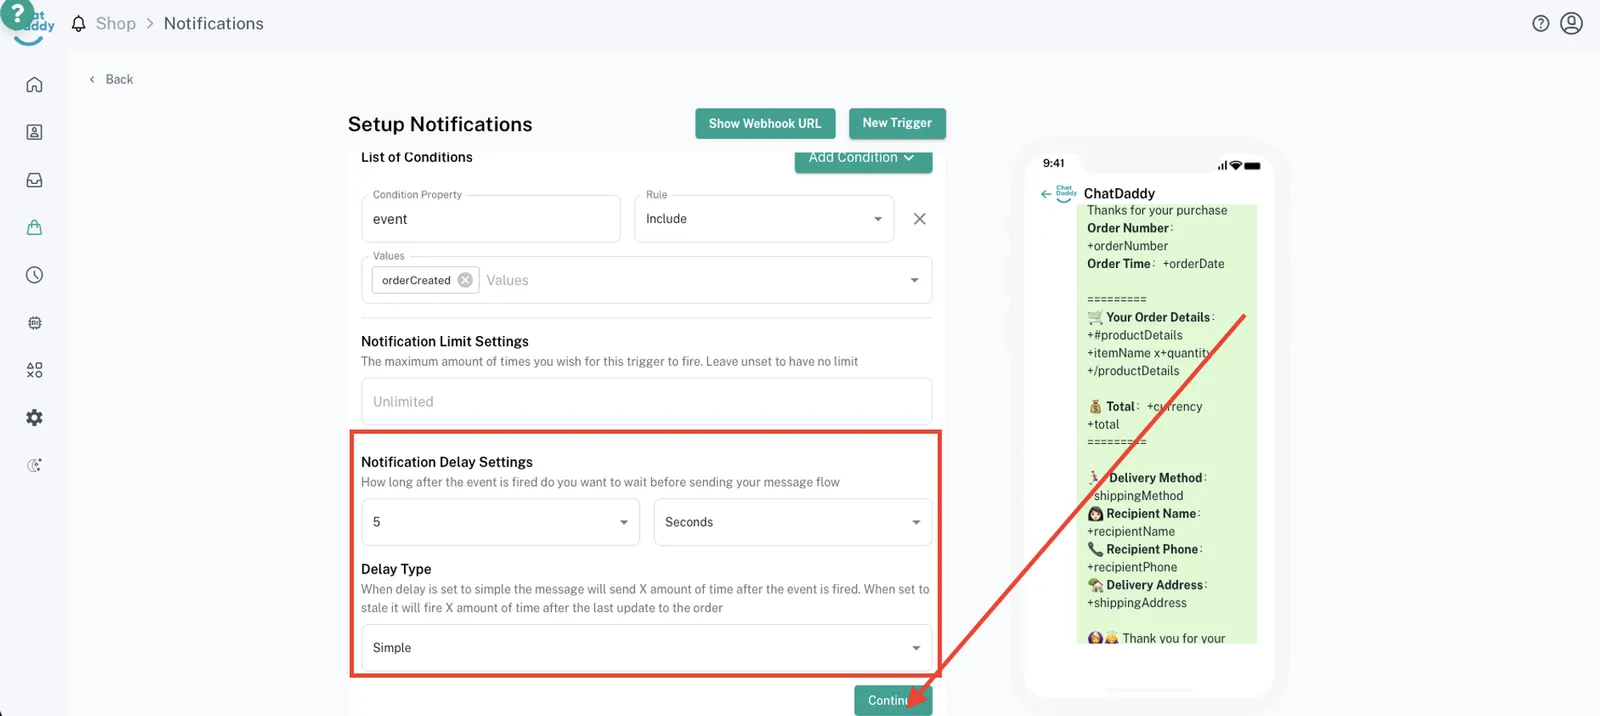
Step 12:
You could edit your message template content here, select your preferred message flow.

List of Conditions - Used to set up the conditions that will trigger the message based on your e-commerce platform
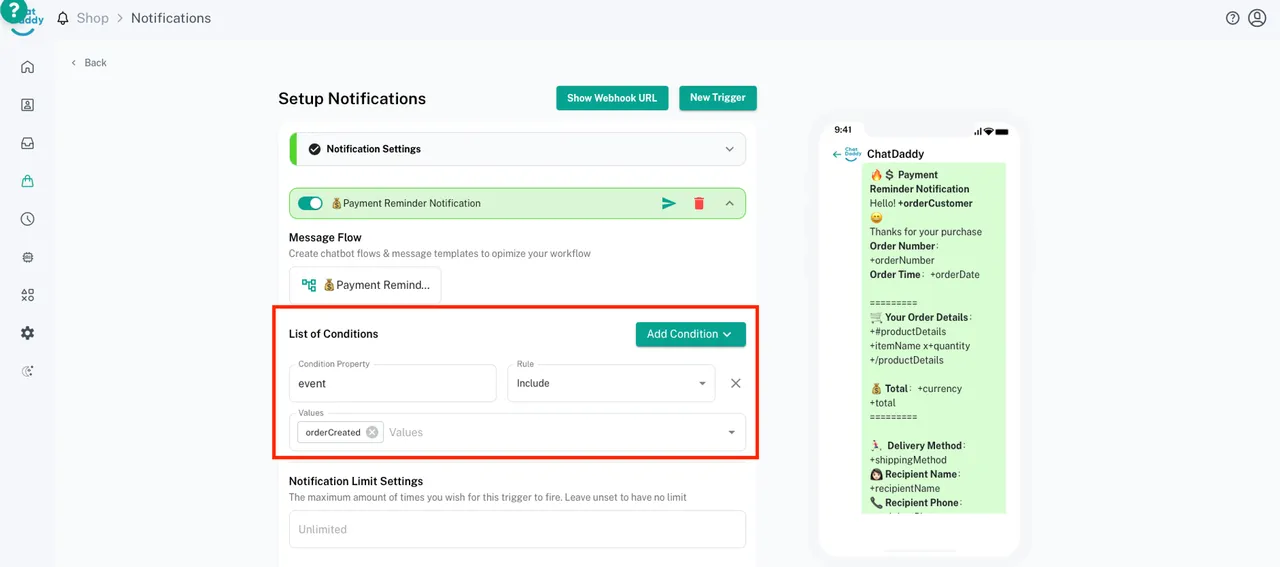
Notification Limit Settings - The maximum amount of times you wish for this trigger to fire. Leave unset to have no limit
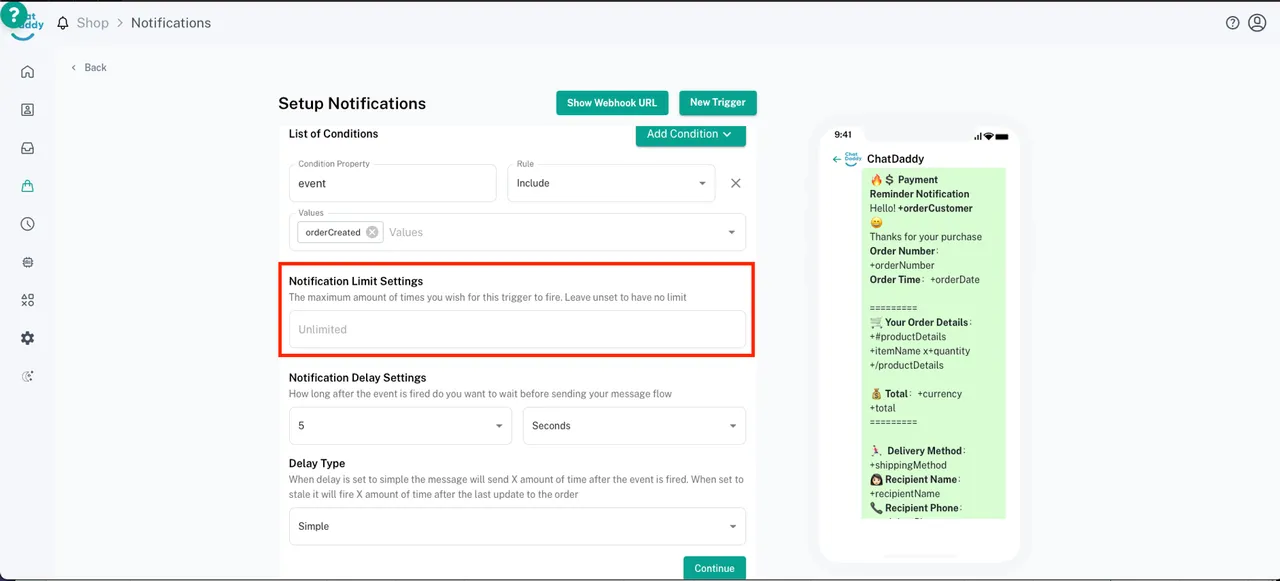
After done checking for the trigger you may click Continue.
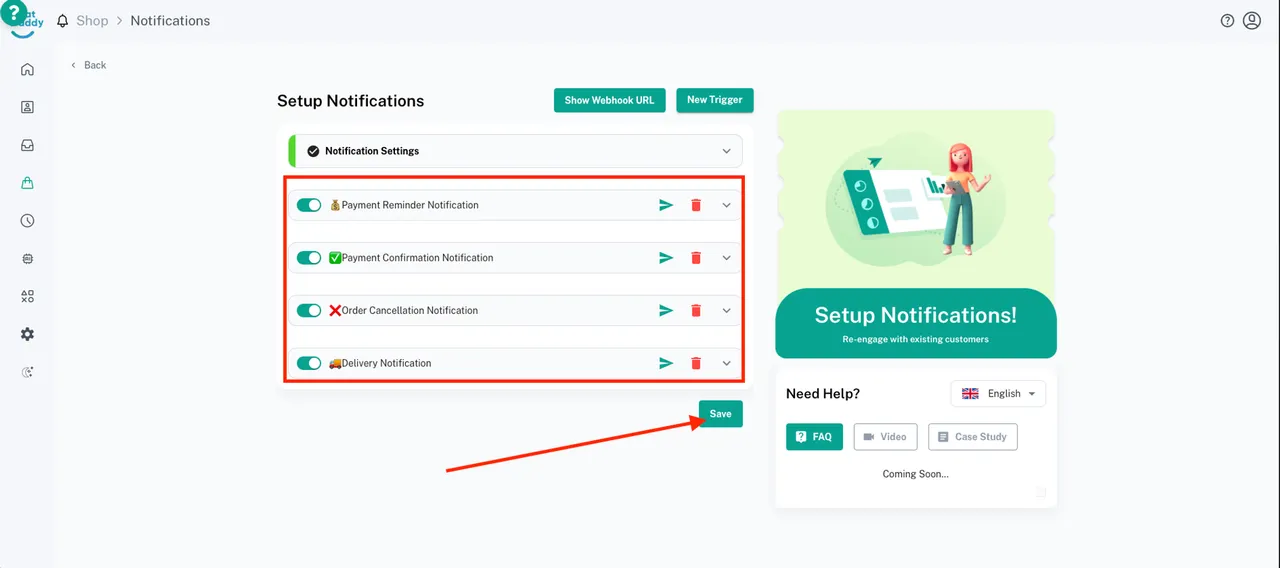
Step 13:
Check Notification Settings and click Continue
「Channel」 - To choose which device to send message from

After done checking for all triggers, click Save and integration is successfully installed!
More Information
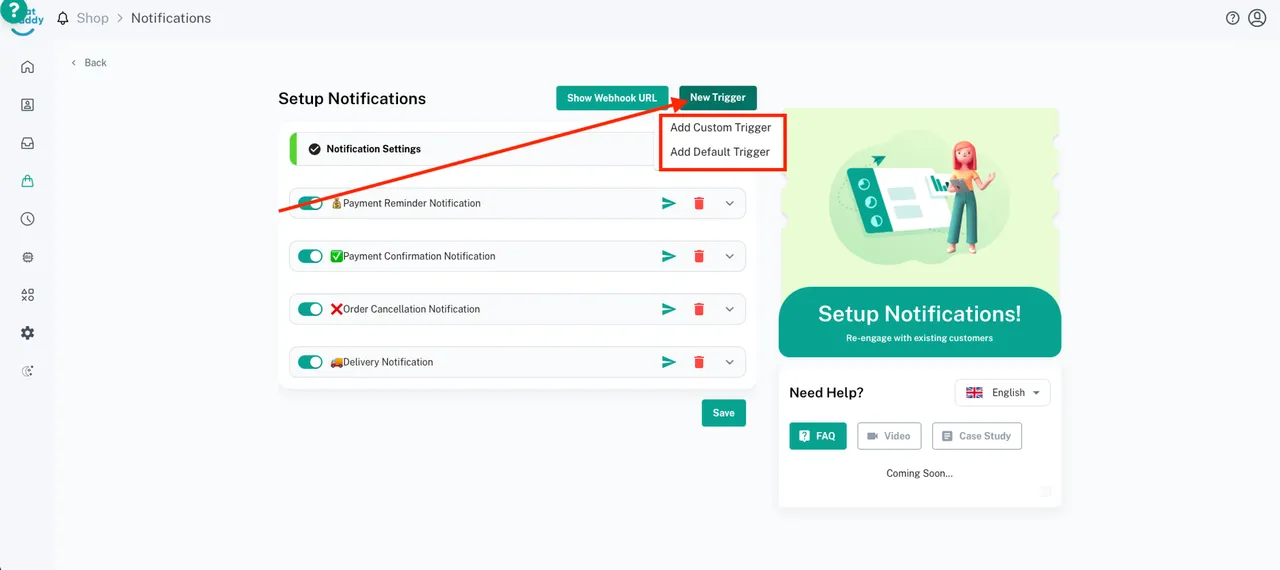
What are all this buttons?
「Add Custom Trigger」- Used to self design trigger with own message template and conditions
「Add Default Trigger」- Used to add trigger messages templates that is made by ChatDaddy
How to enable testing mode
「Output Testing」- This is used to enable testing or send to different receiver’s phone number
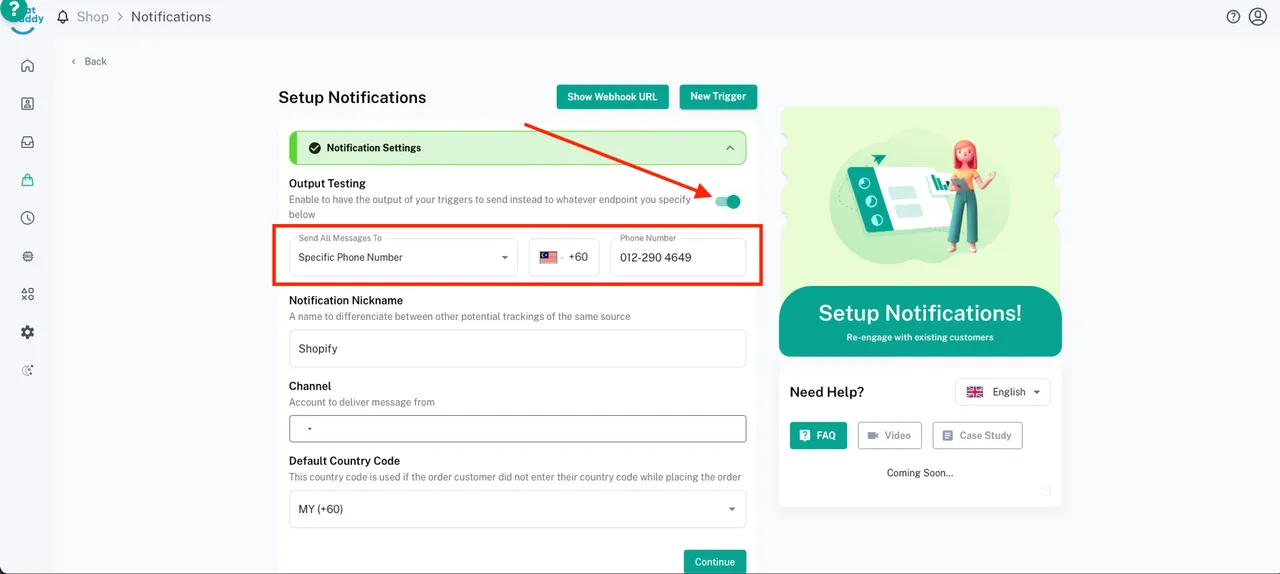
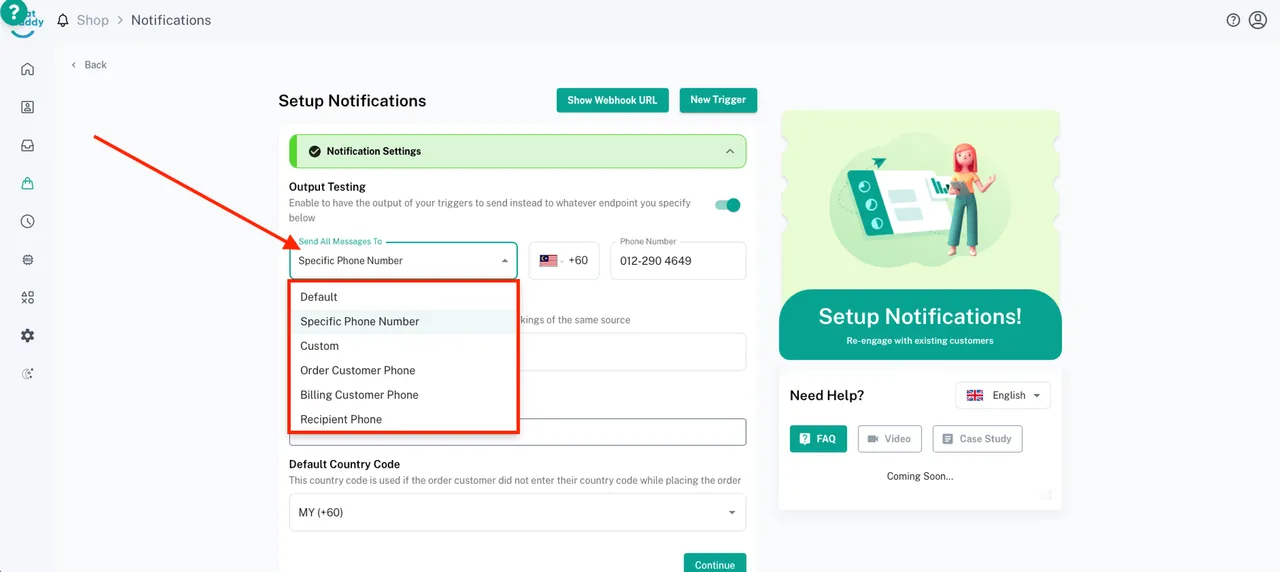
Here you can also set up if you want to send all messages to which type of recipient
How to change message template
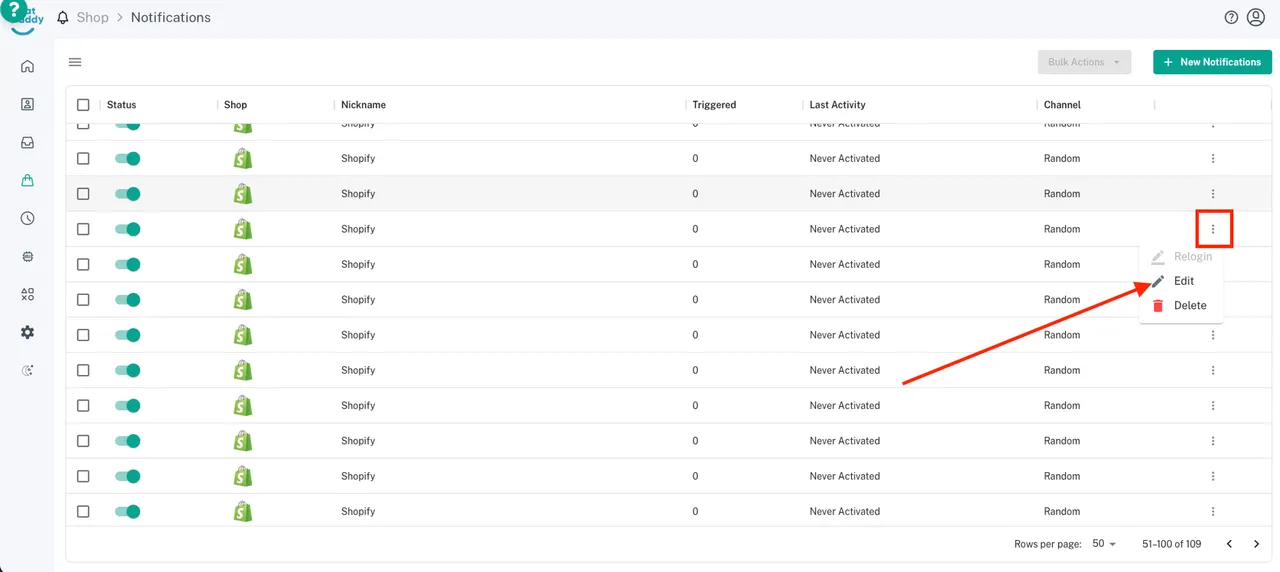
Step 1:
From the Notifications, select an existing integration, click on the 3 dots option icon next to the integration and click [Edit]👇🏻
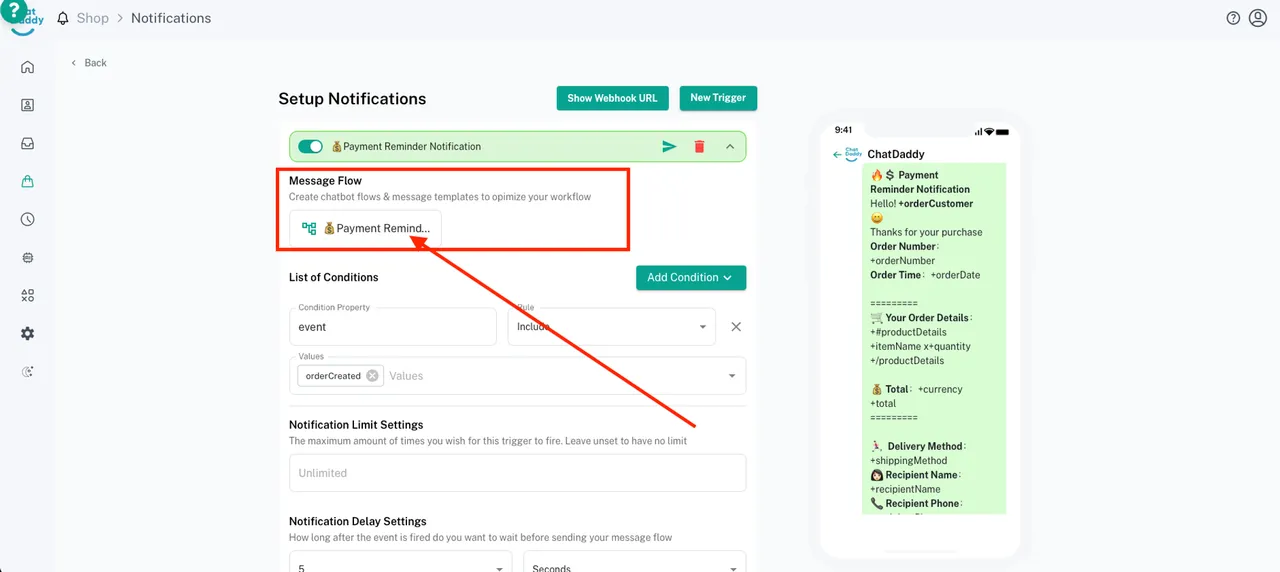
Step 2:
Look for the trigger that you would like to amend your message content, and click on the small arrow on the right side next to trash icon

Step 3:
Once the dropdown panel appears, look for your message template and edit your message template

Once complete edit, ensure your message template is autosaved.