How to install WooCommerce
Please note that this is a known issue on Woo Commerce’s side, please reach out to their support team with your webhook data for this Go to ChatDaddy notifications (https://www.app…
❗ Note: Please note that WooCommerce has to be patch 5.1.0 and above for the integration to work
‼️ Note: Usually Woo Commerce sends us the data for orders in anywhere from 1-5 minutes or so. But occasionally, they do not send the webhook data for hours or even more.
Please note that this is a known issue on Woo Commerce’s side, please reach out to their support team with your webhook data for this
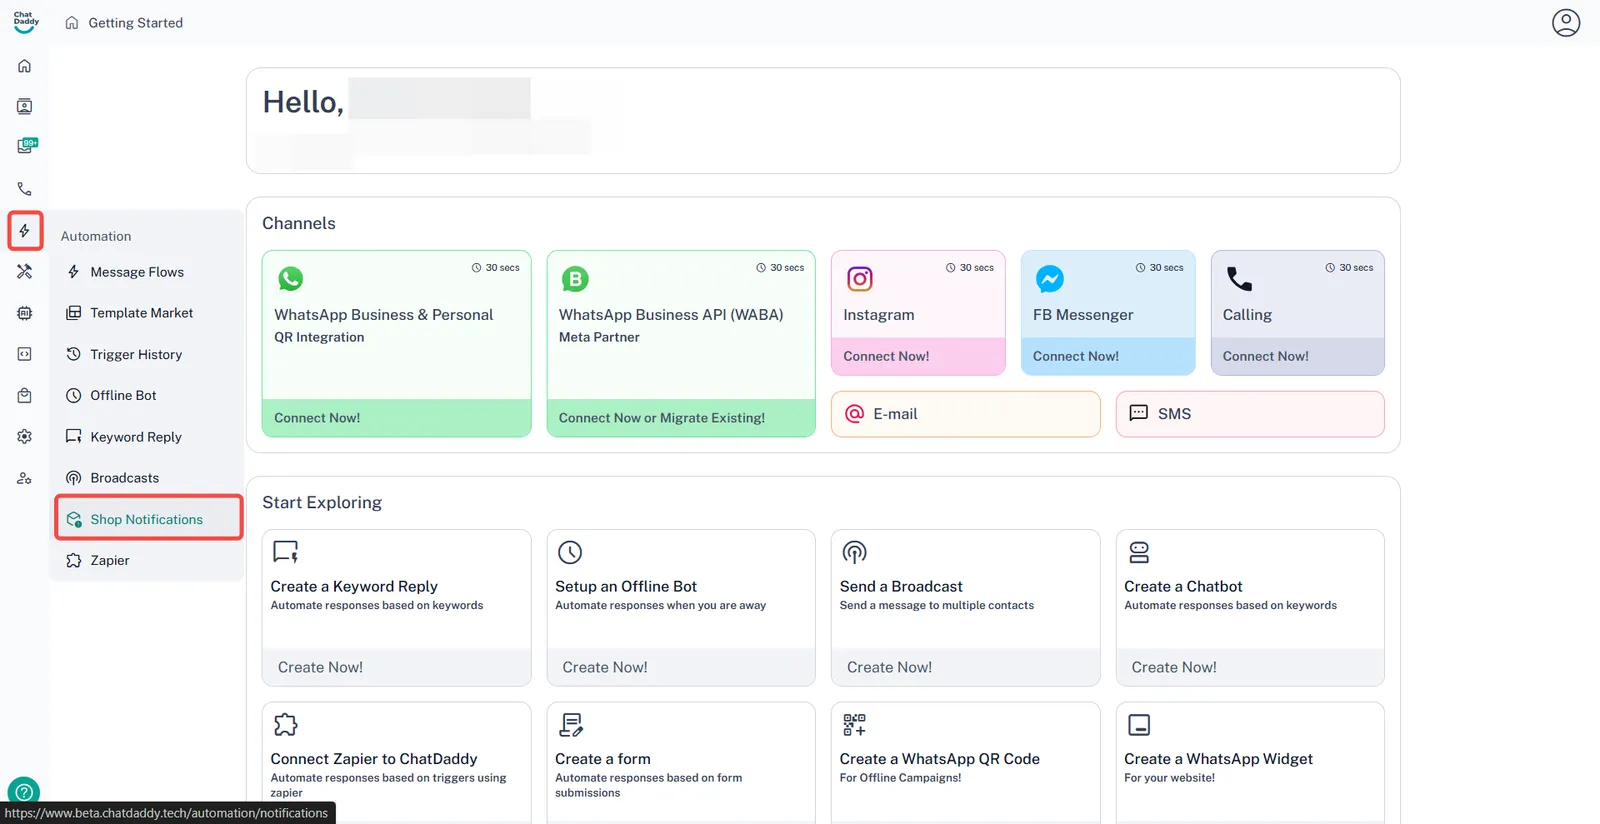
Step 1:
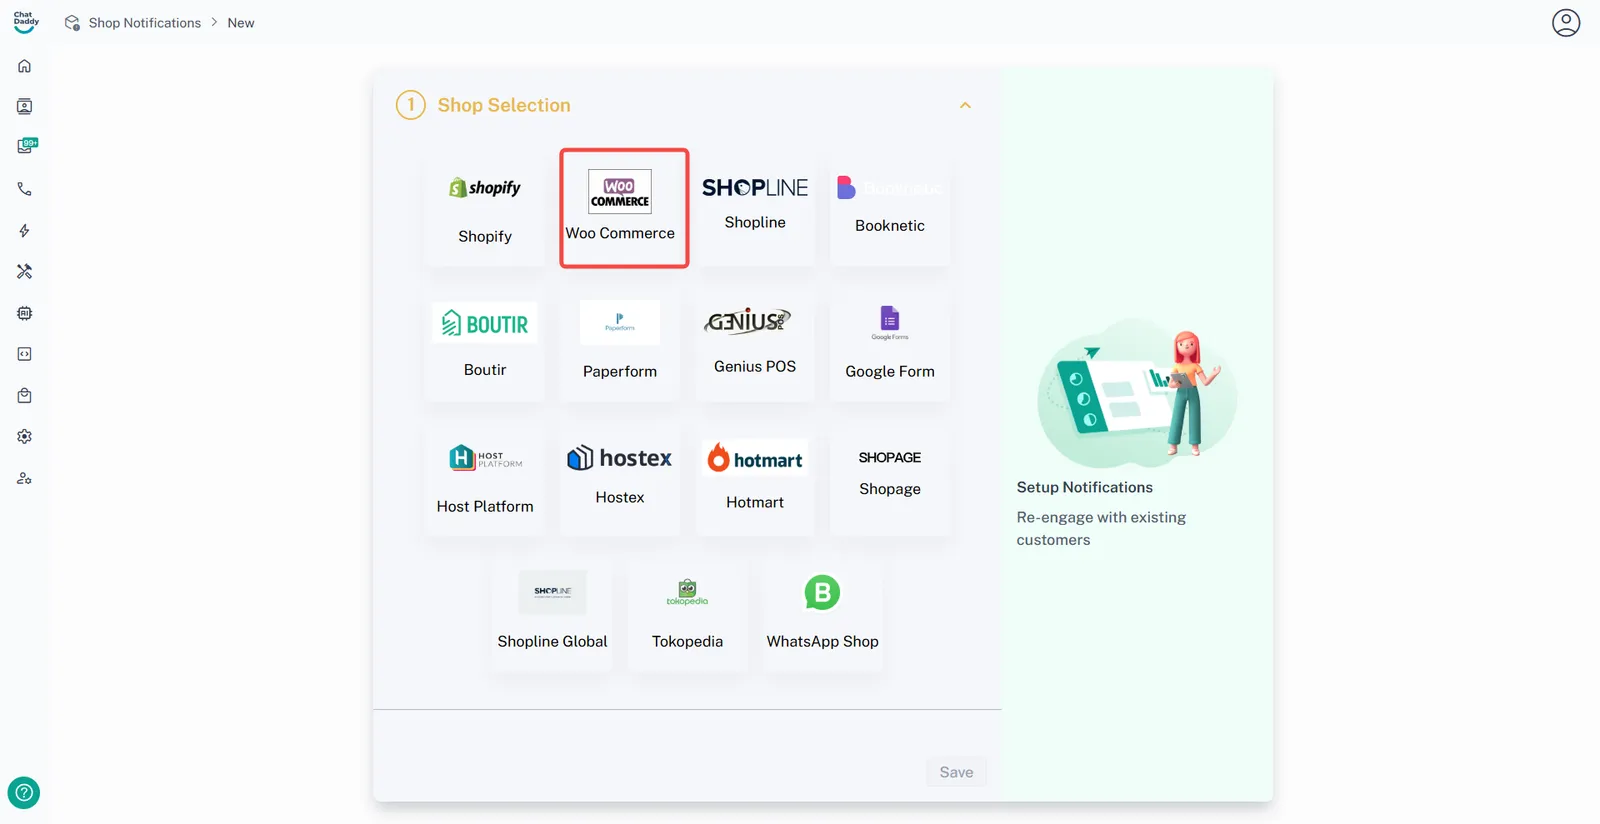
Go to ChatDaddy notifications (https://www.app.chatdaddy.tech/automation/notifications)
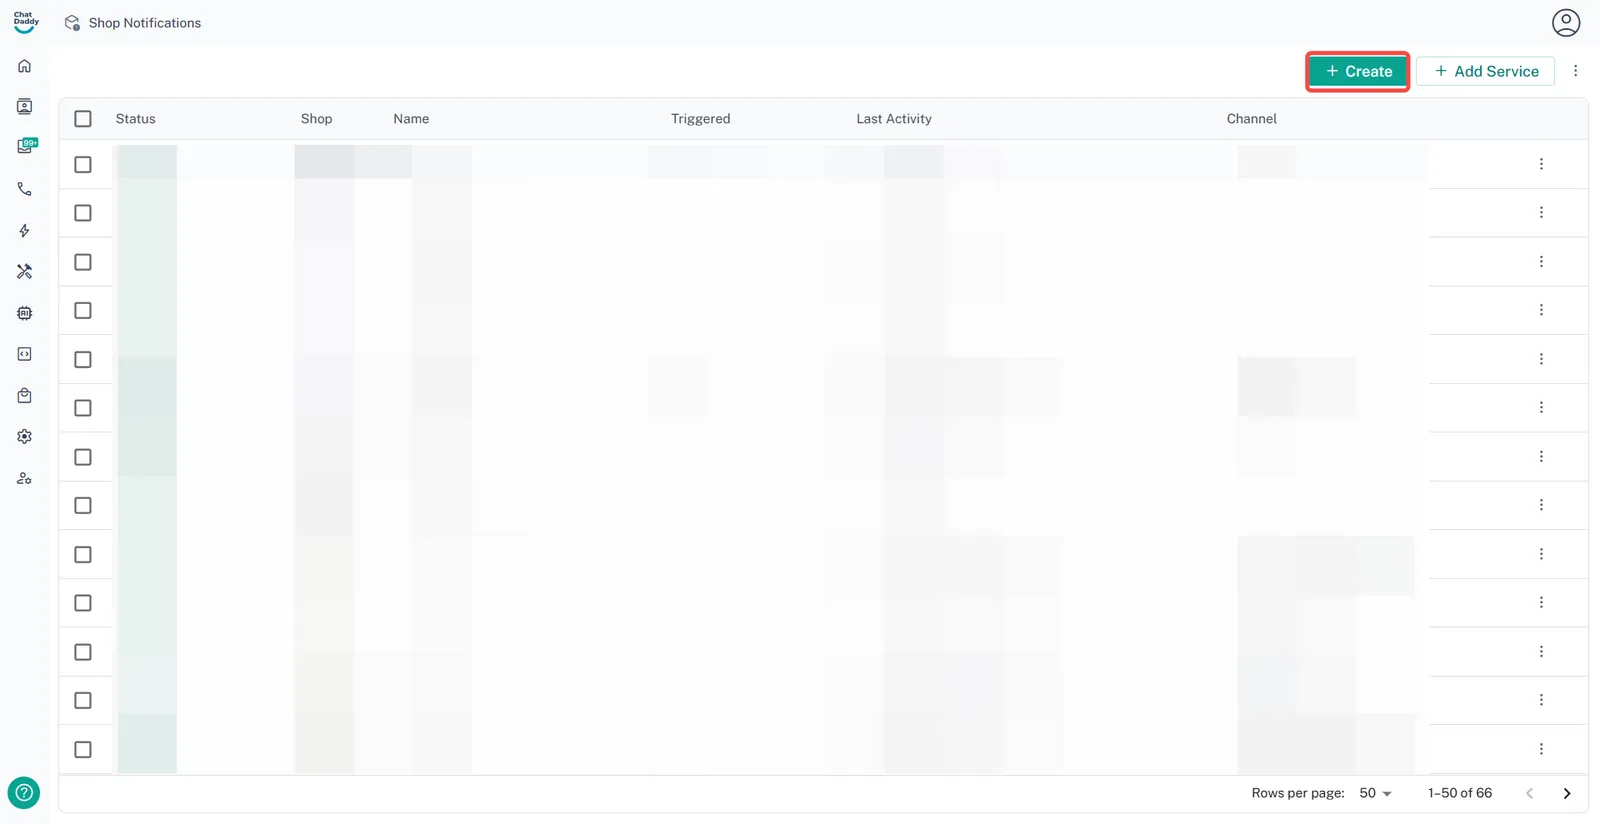
Click on Create button on the top right then click "WooCommerce"
Step 2:
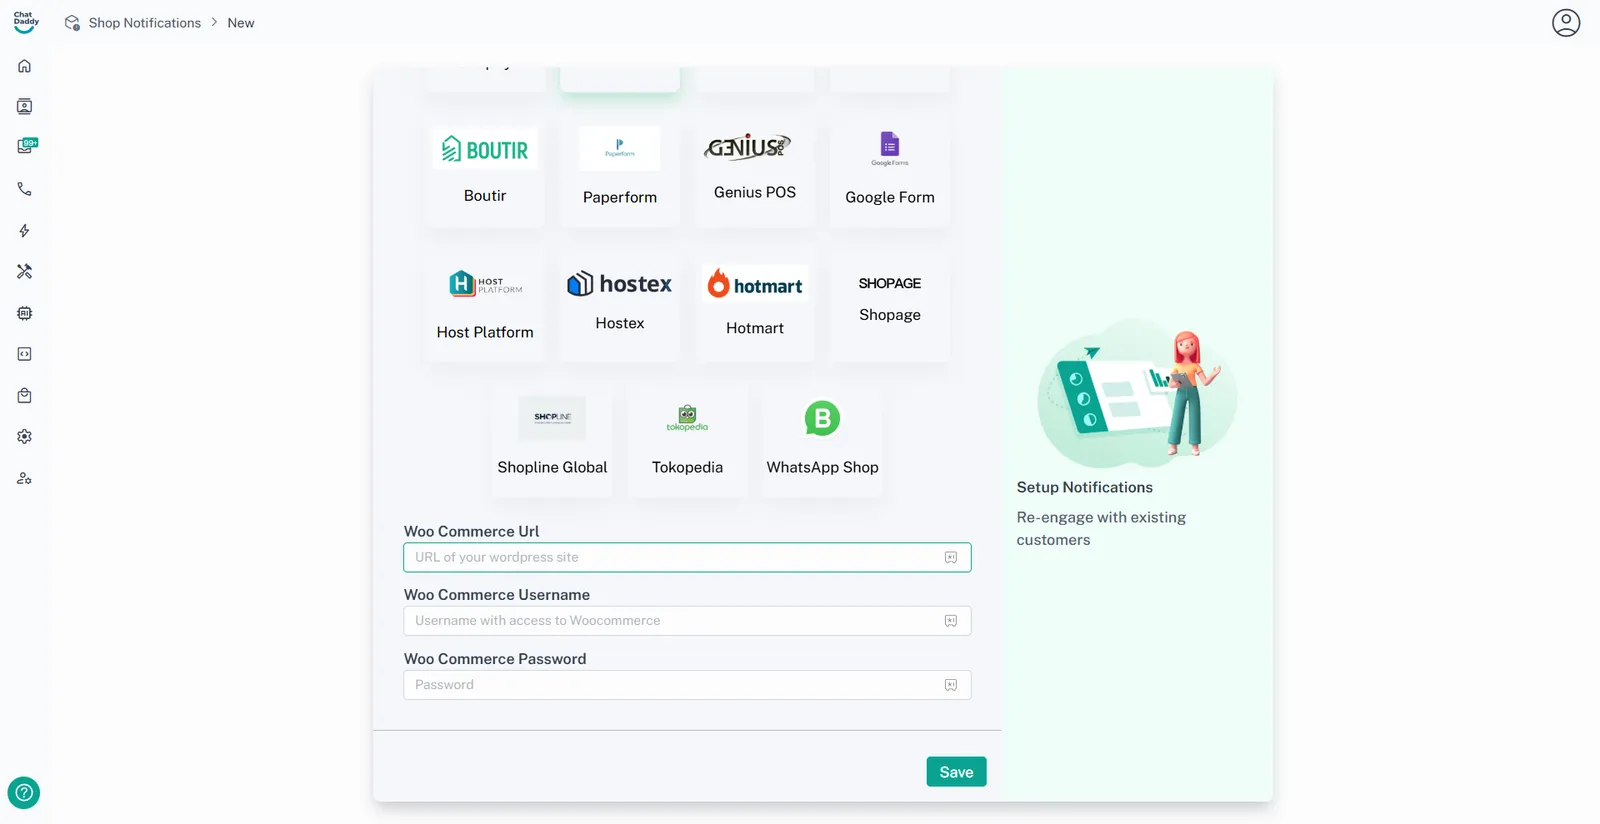
Keep empty for Url, Username and Password, and Click Save
Step 3:
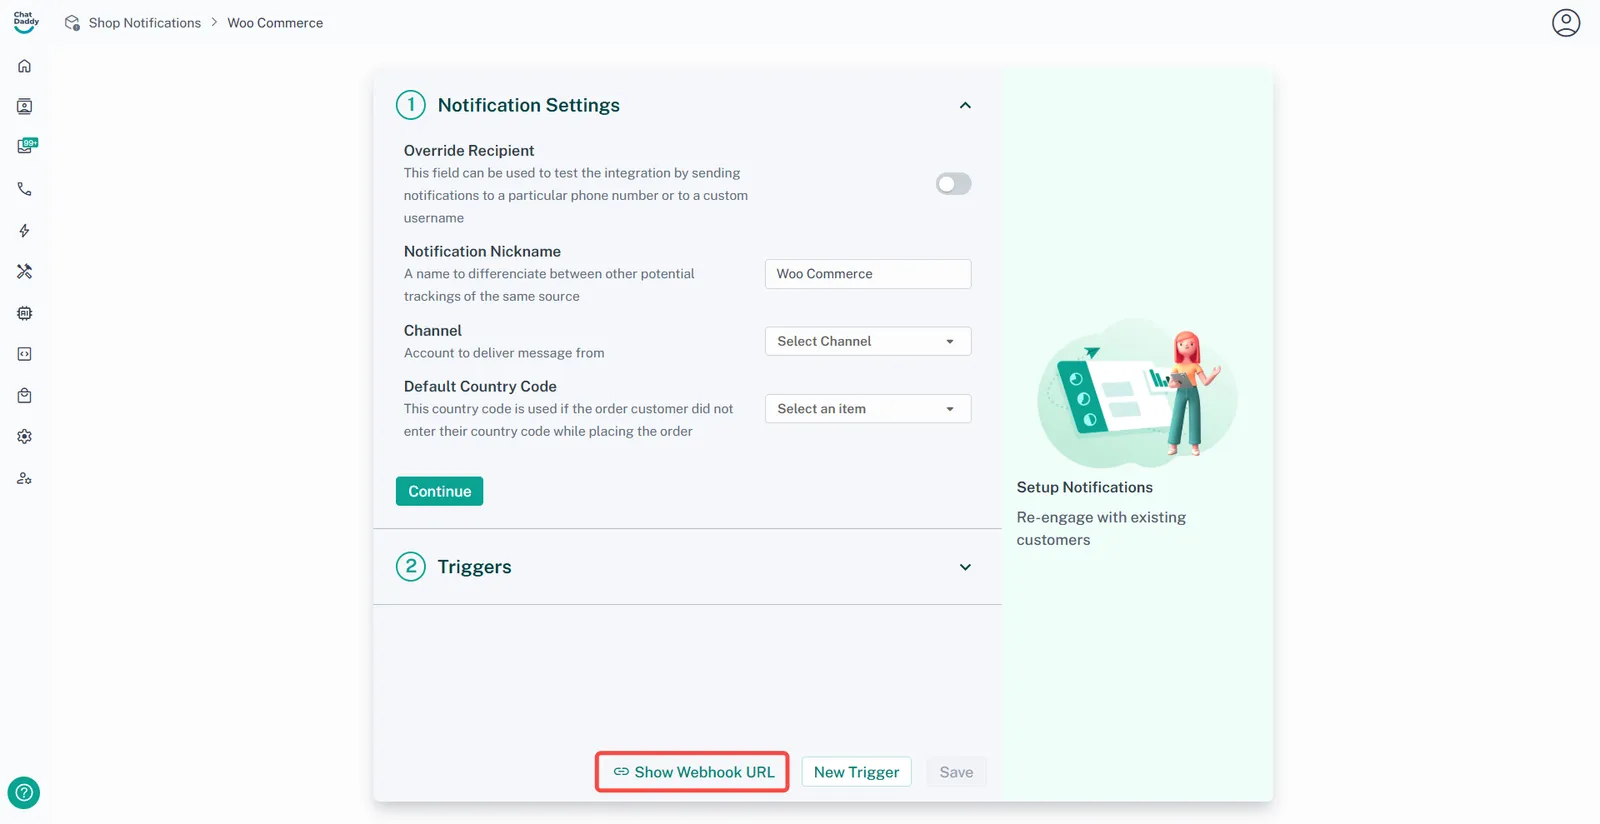
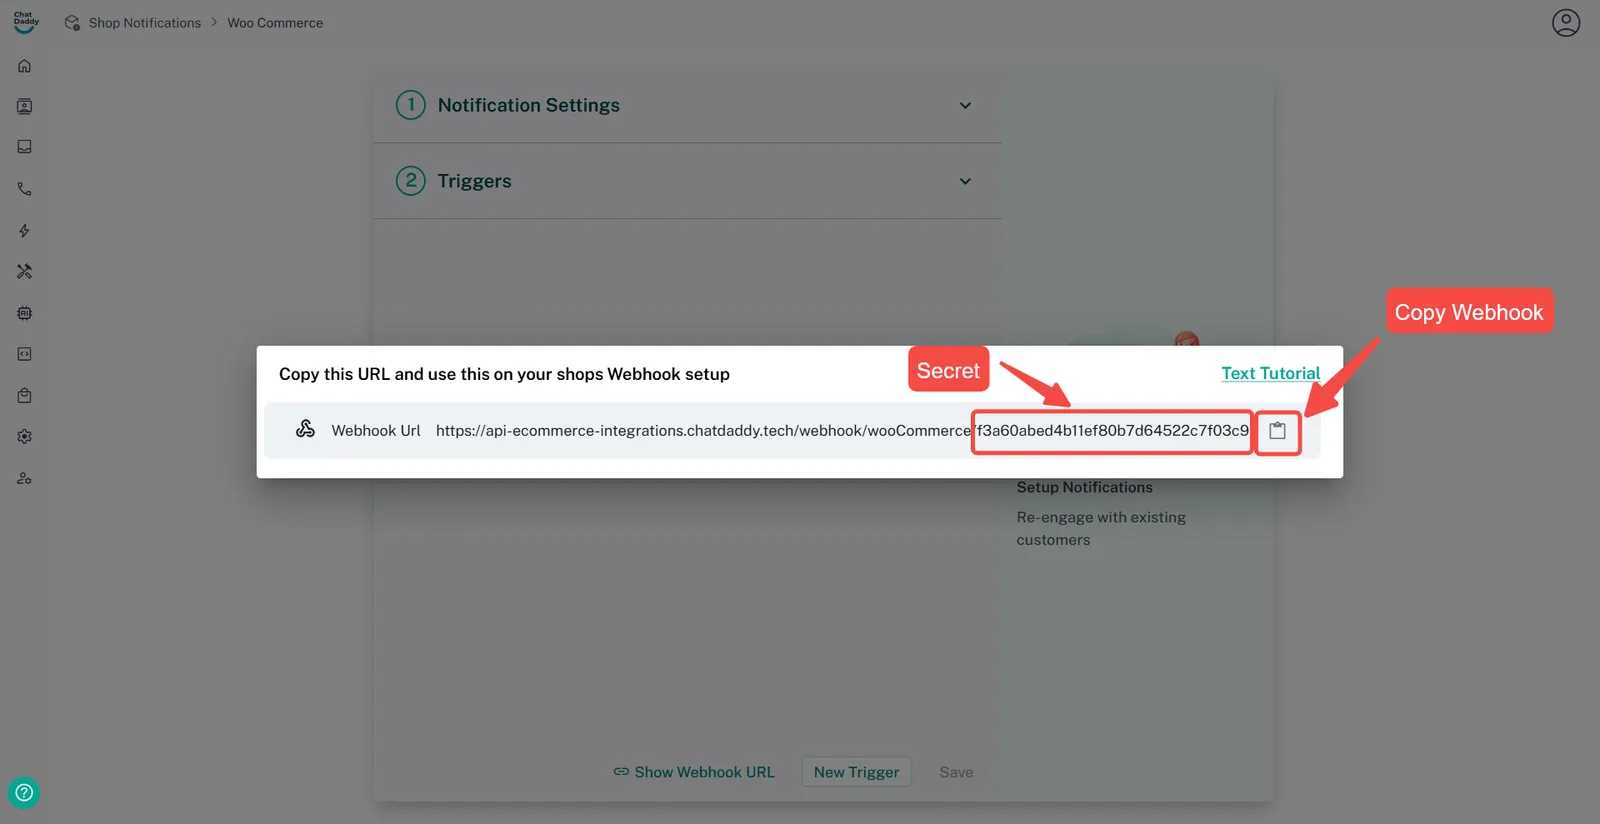
Click on Show Webhook URL Button
Step 4:
Copy the webhook URL

Step 5:
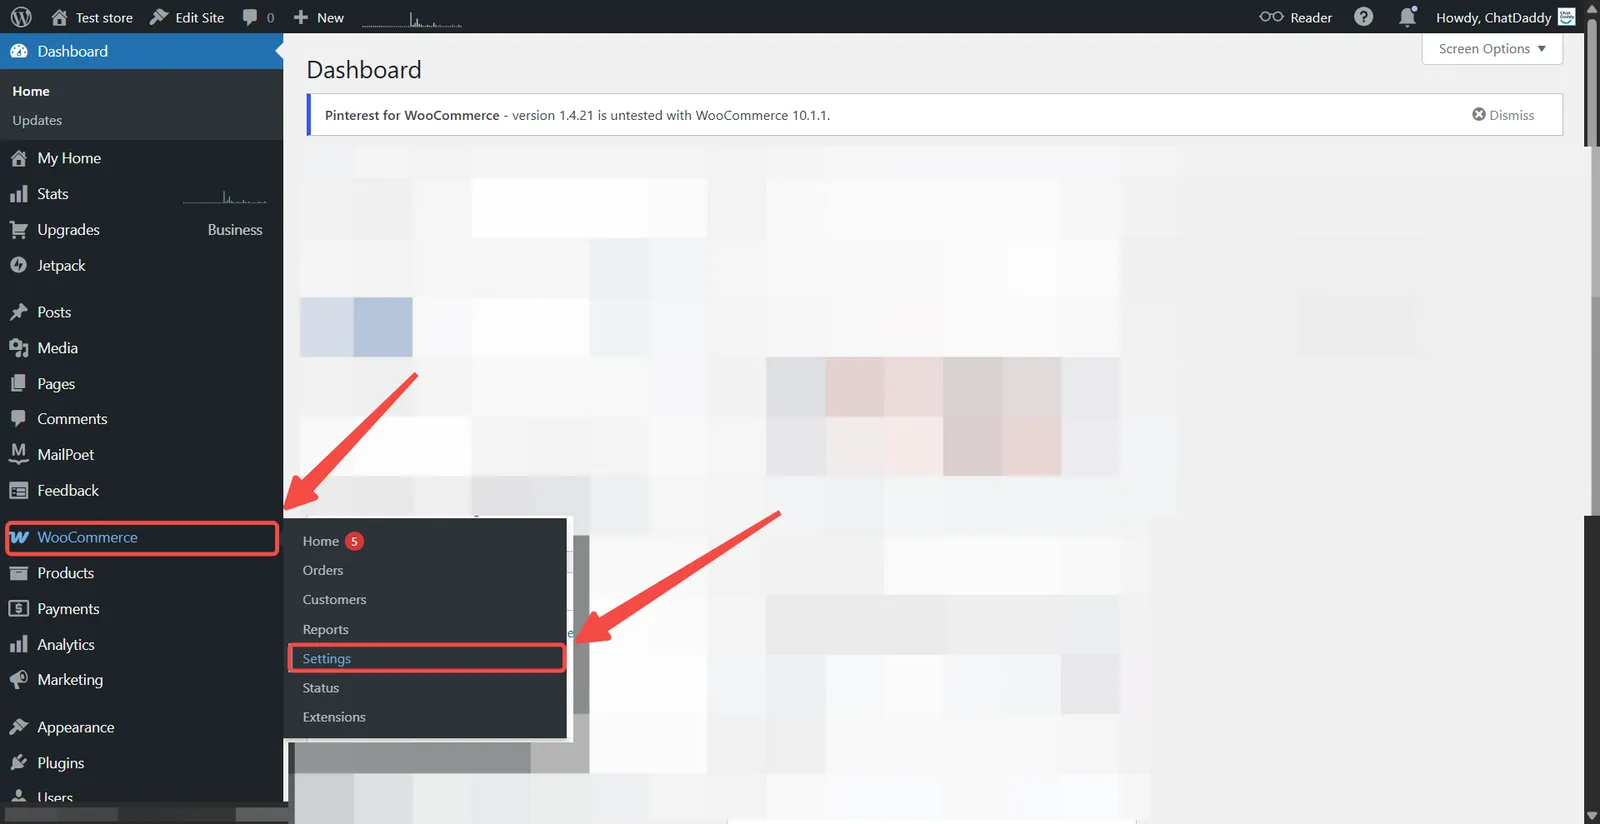
Login to your WordPress account. Head to the WP admin panel, and click on Settings WooCommerce bar.
Step 6:
- Click on Advanced.

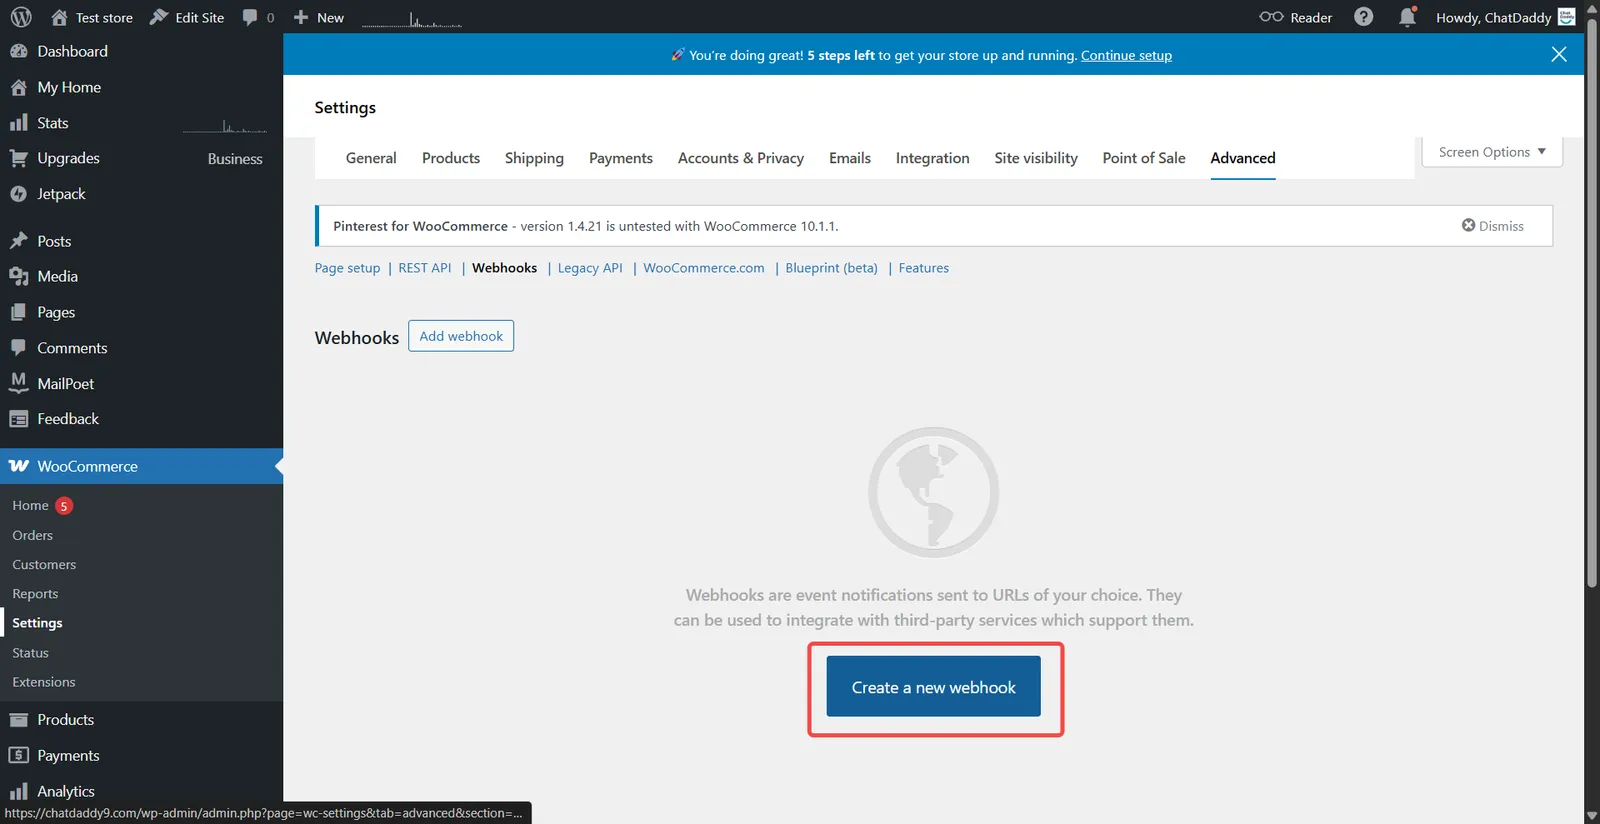
- Click on Webhook Button.
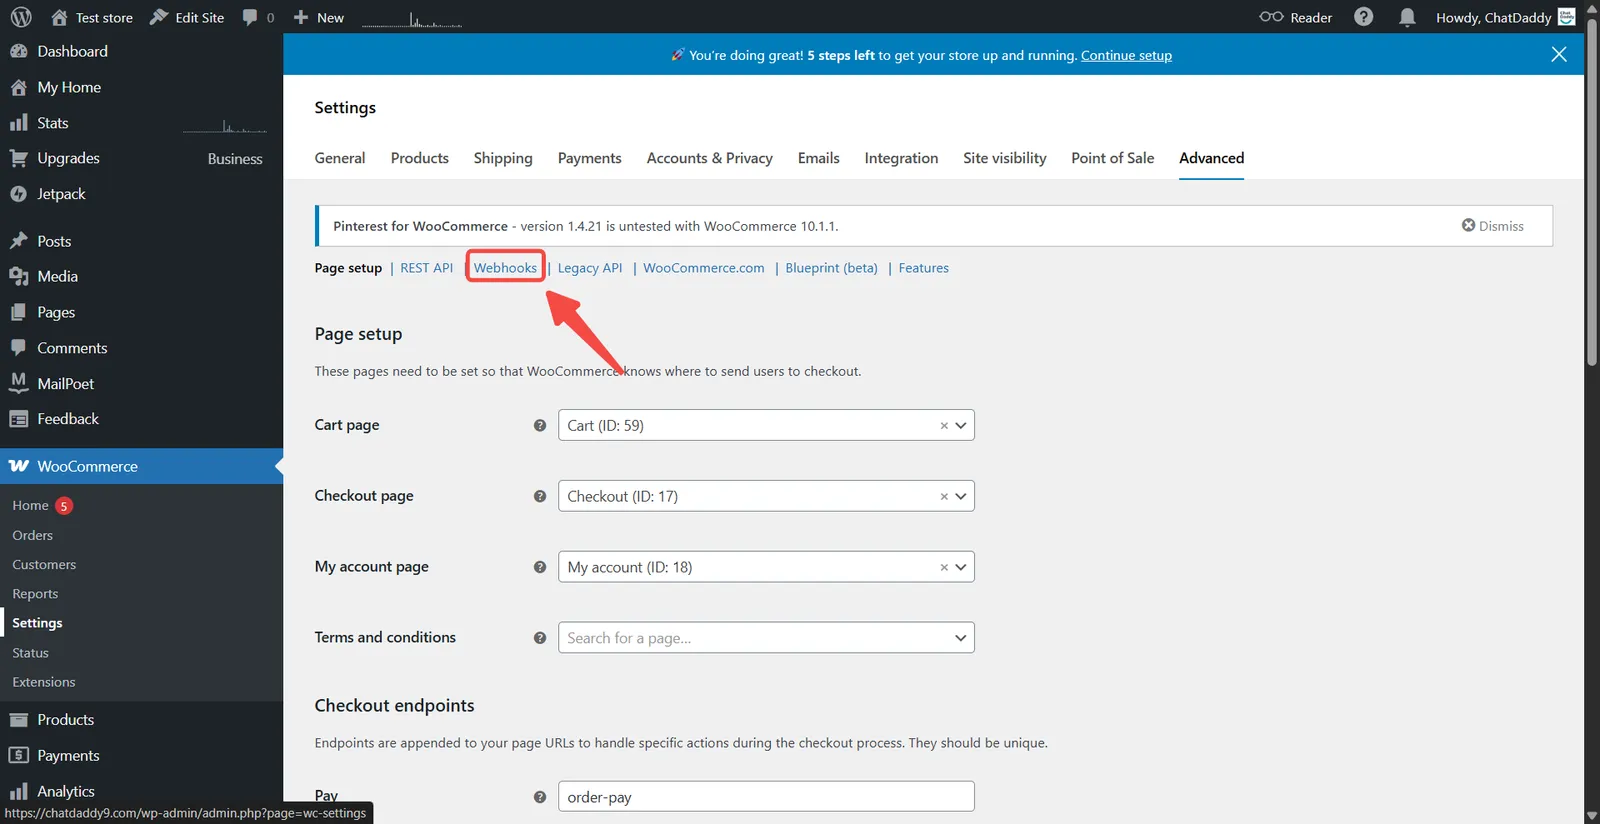
- Click on Create a new Webhook
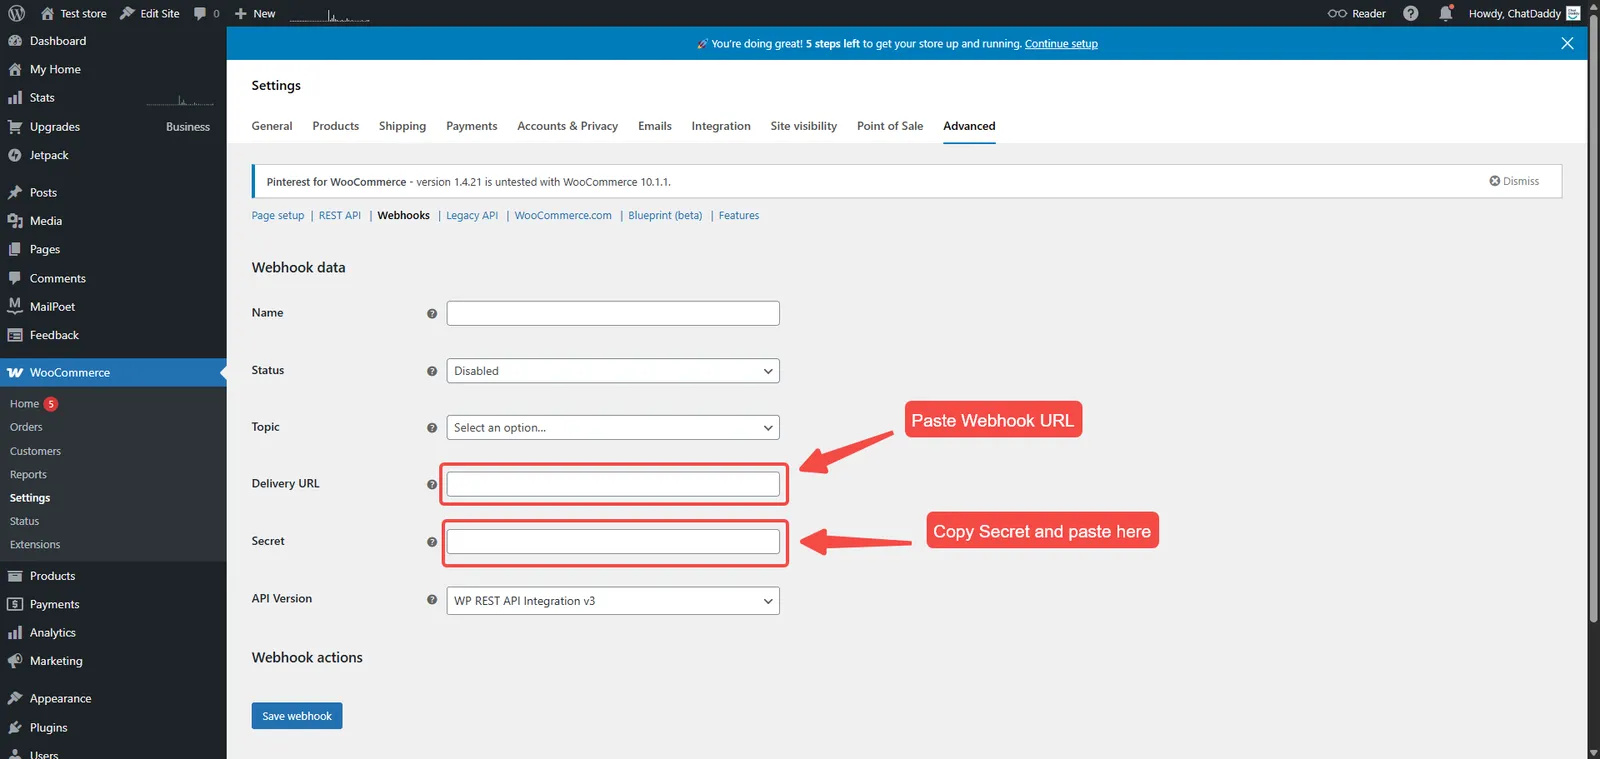
Step 7:
-
Give a Name
-
Select the status
-
Select a Topic, Available Topics are : "Order Created", "Order Updated", "Order Deleted”
-
Paste the copied webhook Url from Step 4 on Delivery URL.
-
Paste the copied webhook Suffix on Secret.
-
For API Version, select WP REST API Integration v3
-
Click on Save Webhook button
Note: You also need to add 2 more webhook for Order Updated and Order Deleted. Keep the webhook URL and Secret same.
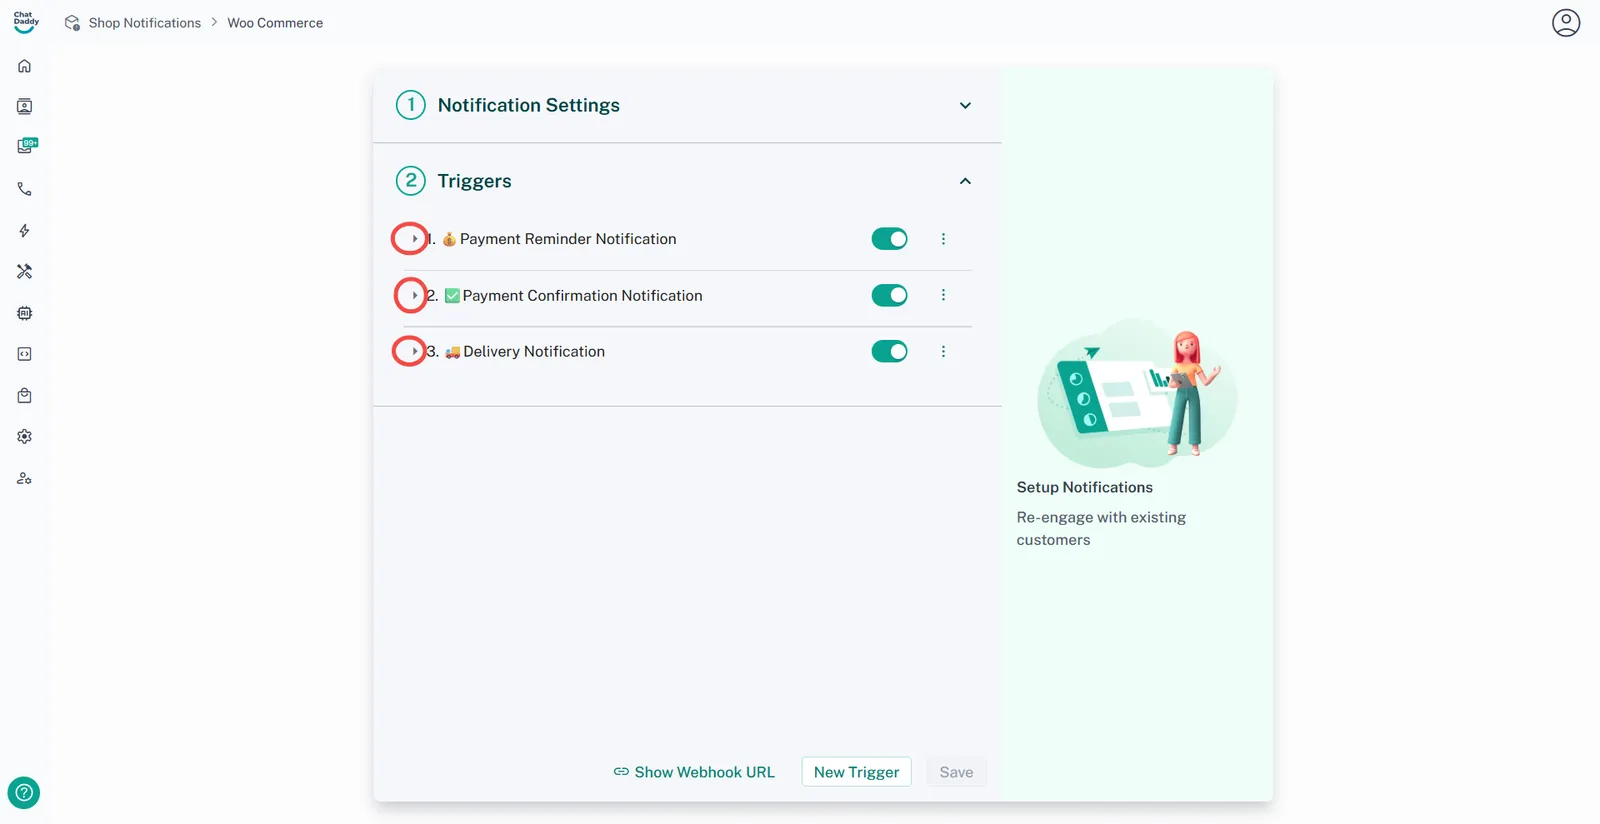
Step 8:
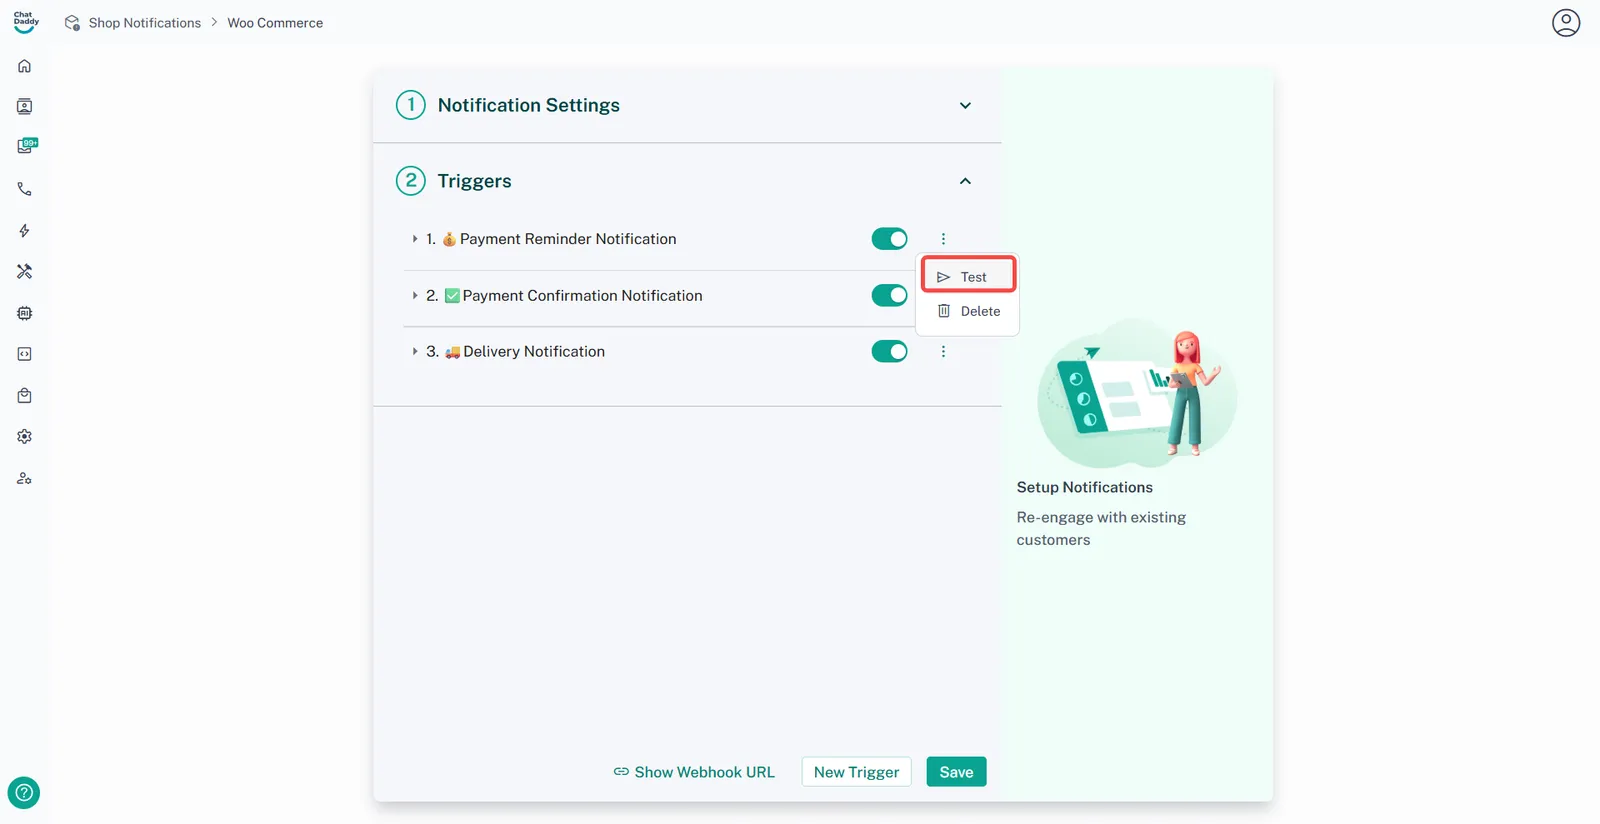
In ChatDaddy, you may click the arrow next to each type of notification (eg. Payment Reminder Notification) to check your trigger settings
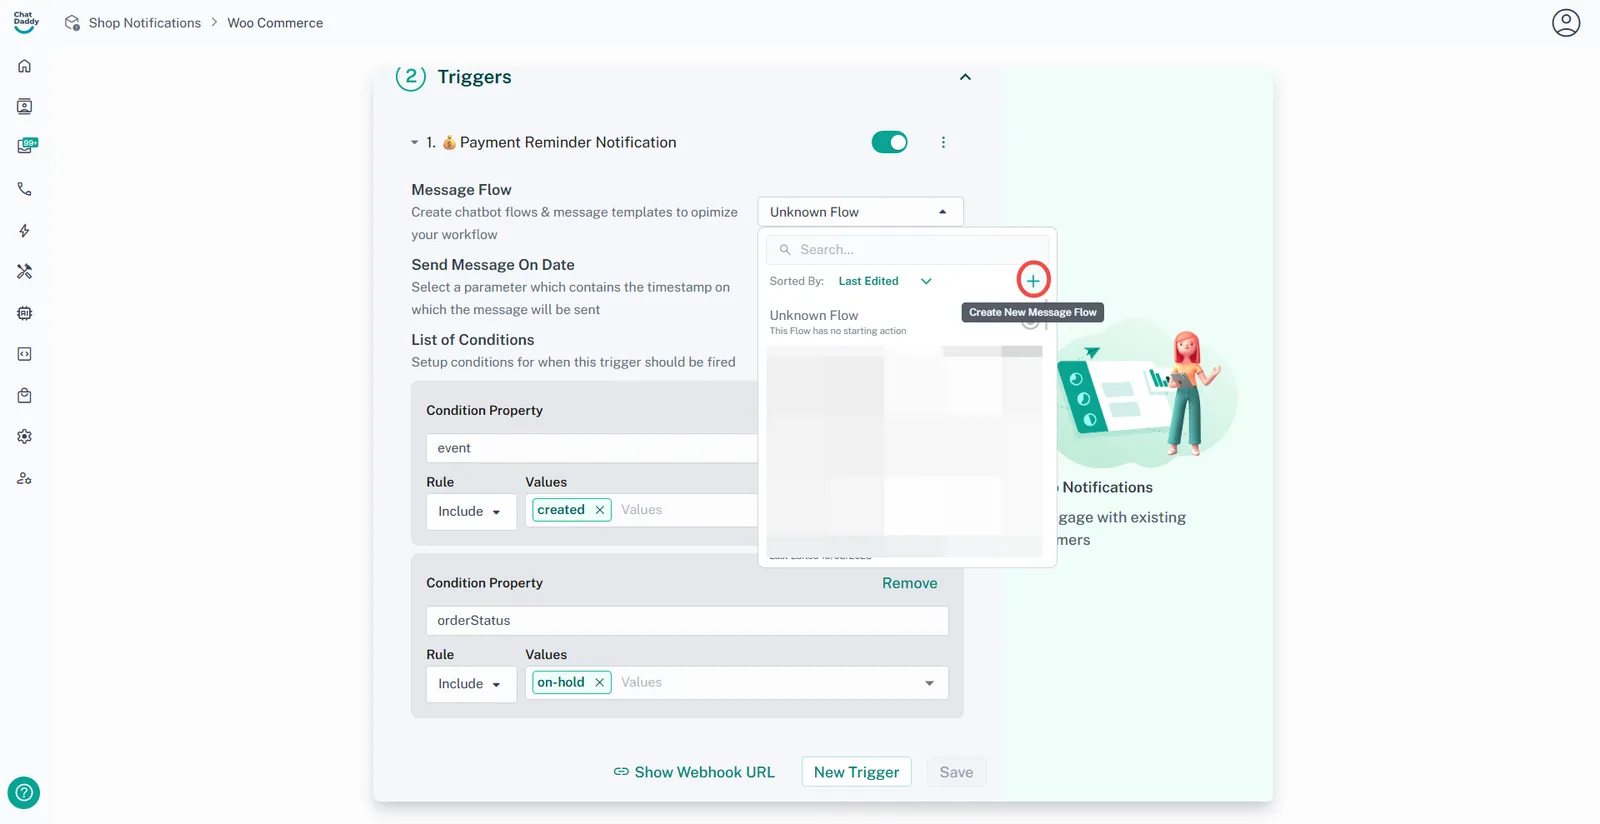
Step 9:
You could change or edit your message template content here (optional)

You may create a new flow or use an existing flow:
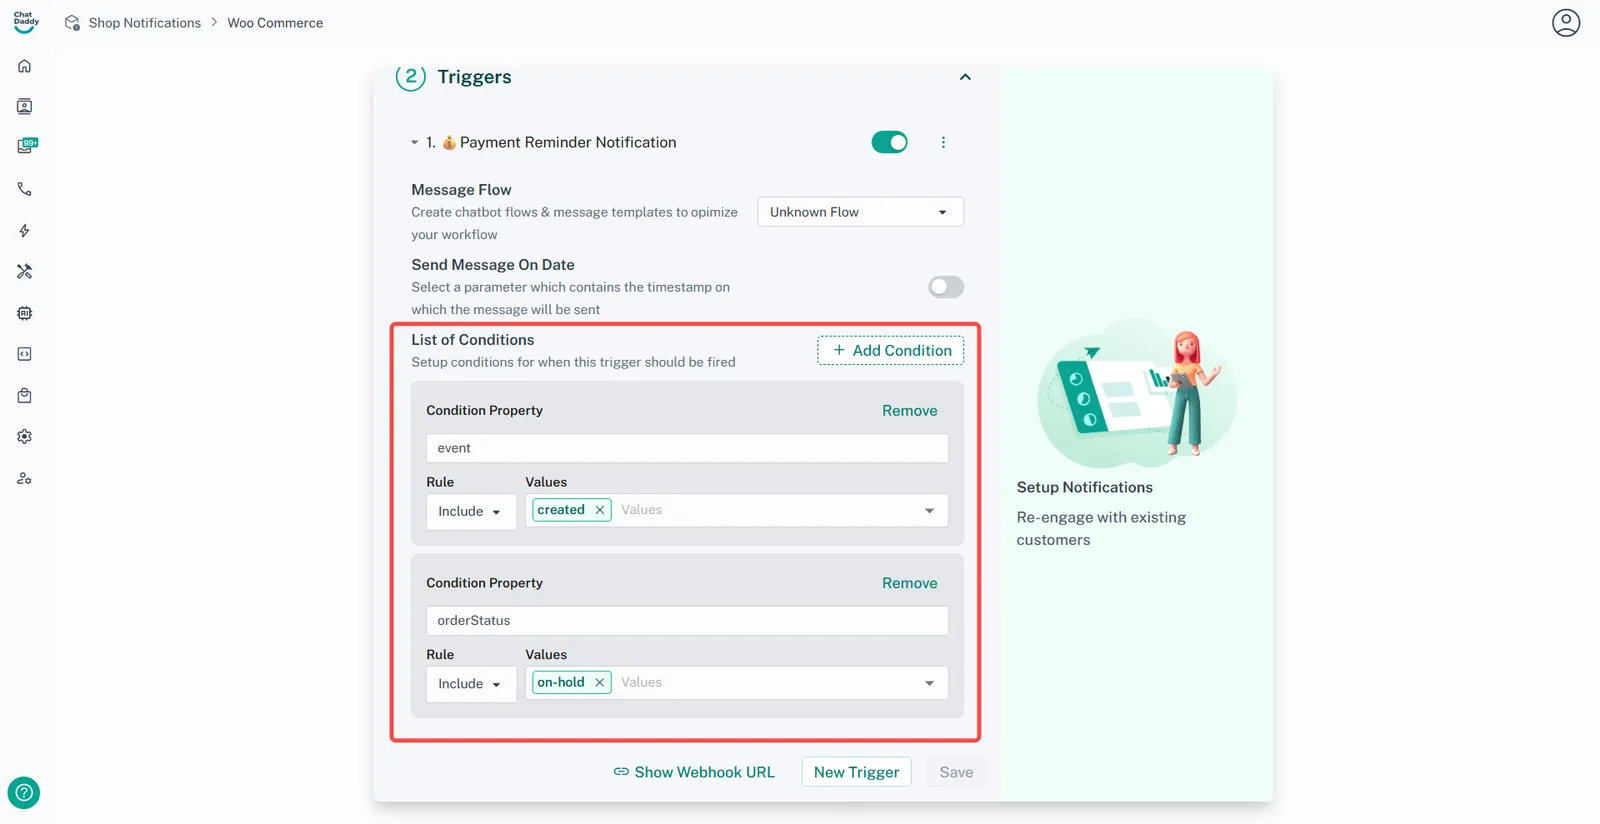
Step 10:
List of Conditions - Used to set up the conditions that will trigger the message based on your e-commerce platform.
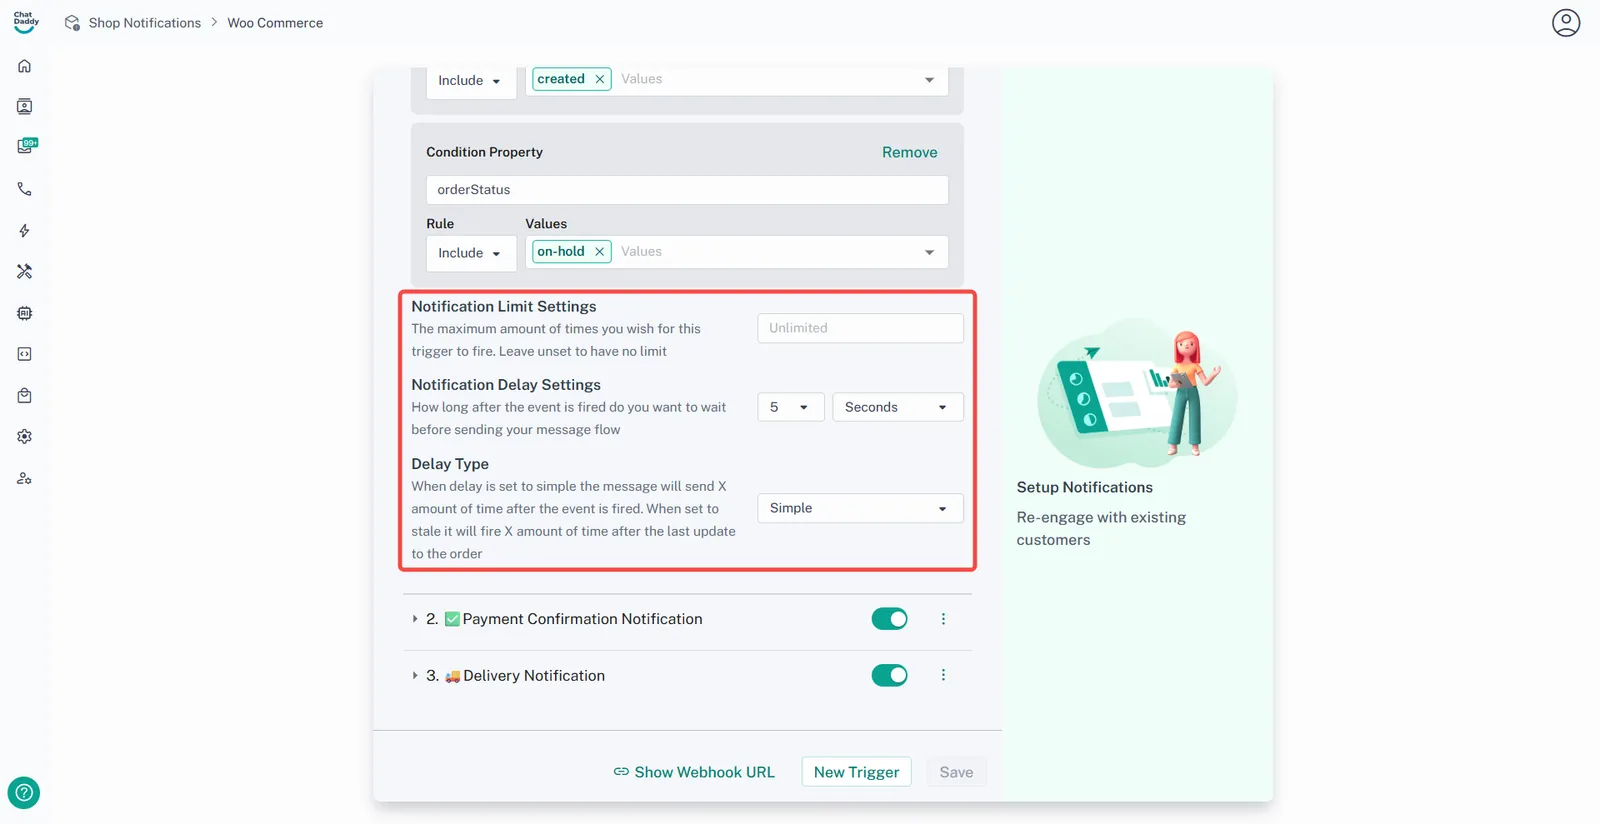
Step 11:
Notification Limit Settings - The maximum amount of times you wish for this trigger to fire. Leave unset to have no limit.
Step 12:
Notification Delay Settings - How long after the event is fired do you want to wait before sending your message flow (used to delay triggered message)
Delay Type - Used to set up the condition of the delay
- Simple
This function is to send the notification even if the condition is not met.
Example: if the “payment reminder” trigger is set to notify the client in 4 days, it will send even if the condition of the order status is “delivered”
- Stale
This function is to send a notification when the condition is met.
Example: if the “payment reminder” trigger is set to notify the client in 4 days, it will not send if the condition is anything other than “payment reminder”
After done checking for the trigger you may click Continue.
Step 13:
Repeat Step 4 to Step 7 for each trigger setting.
Step 14:
Check Notification Settings and click Continue [Channel] - To choose which device to send a message from.
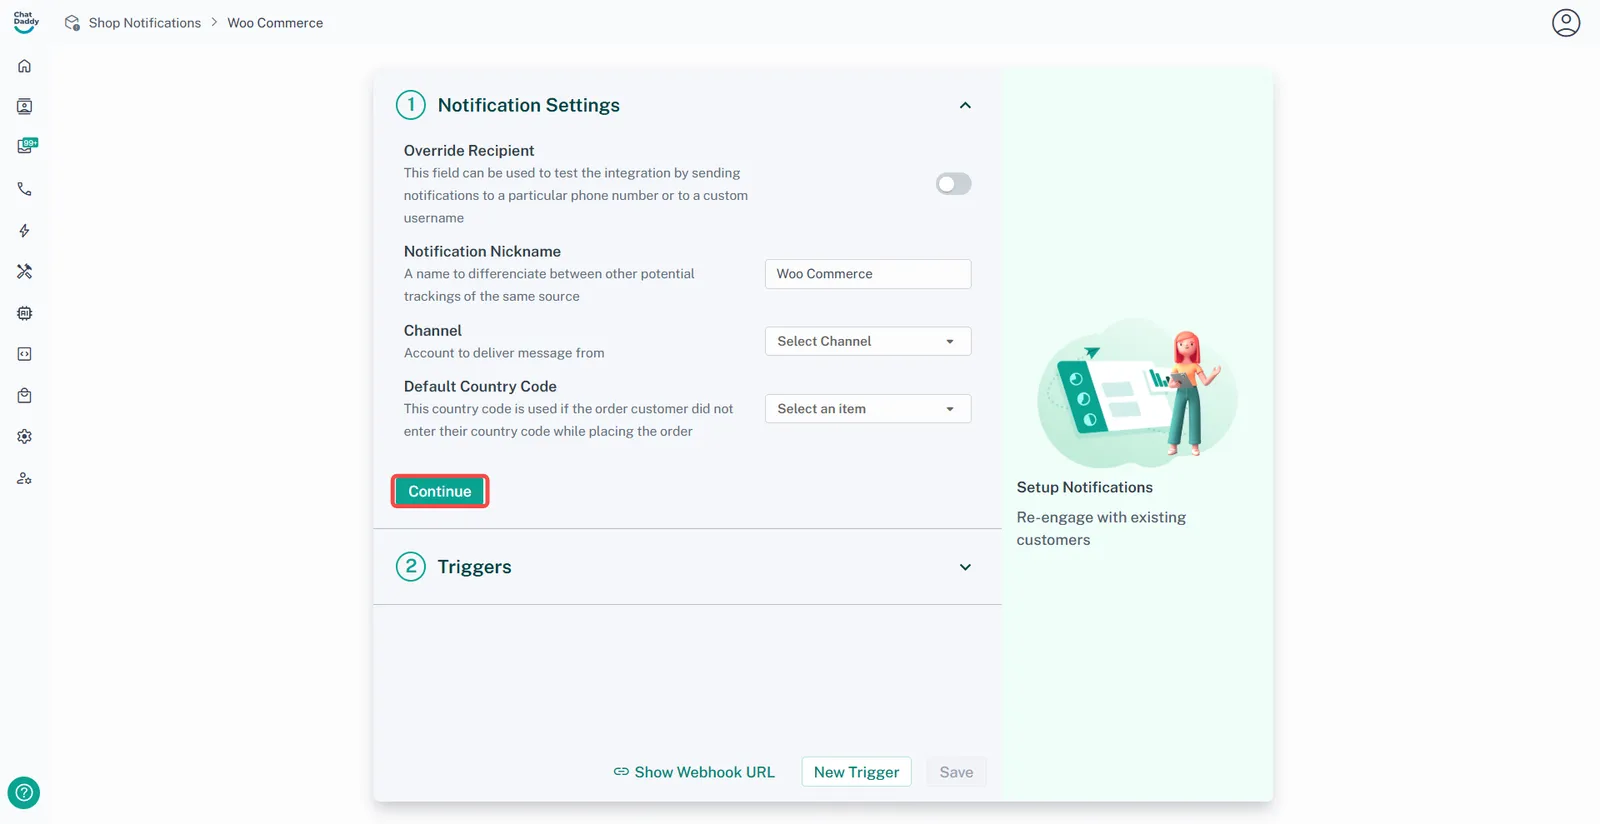
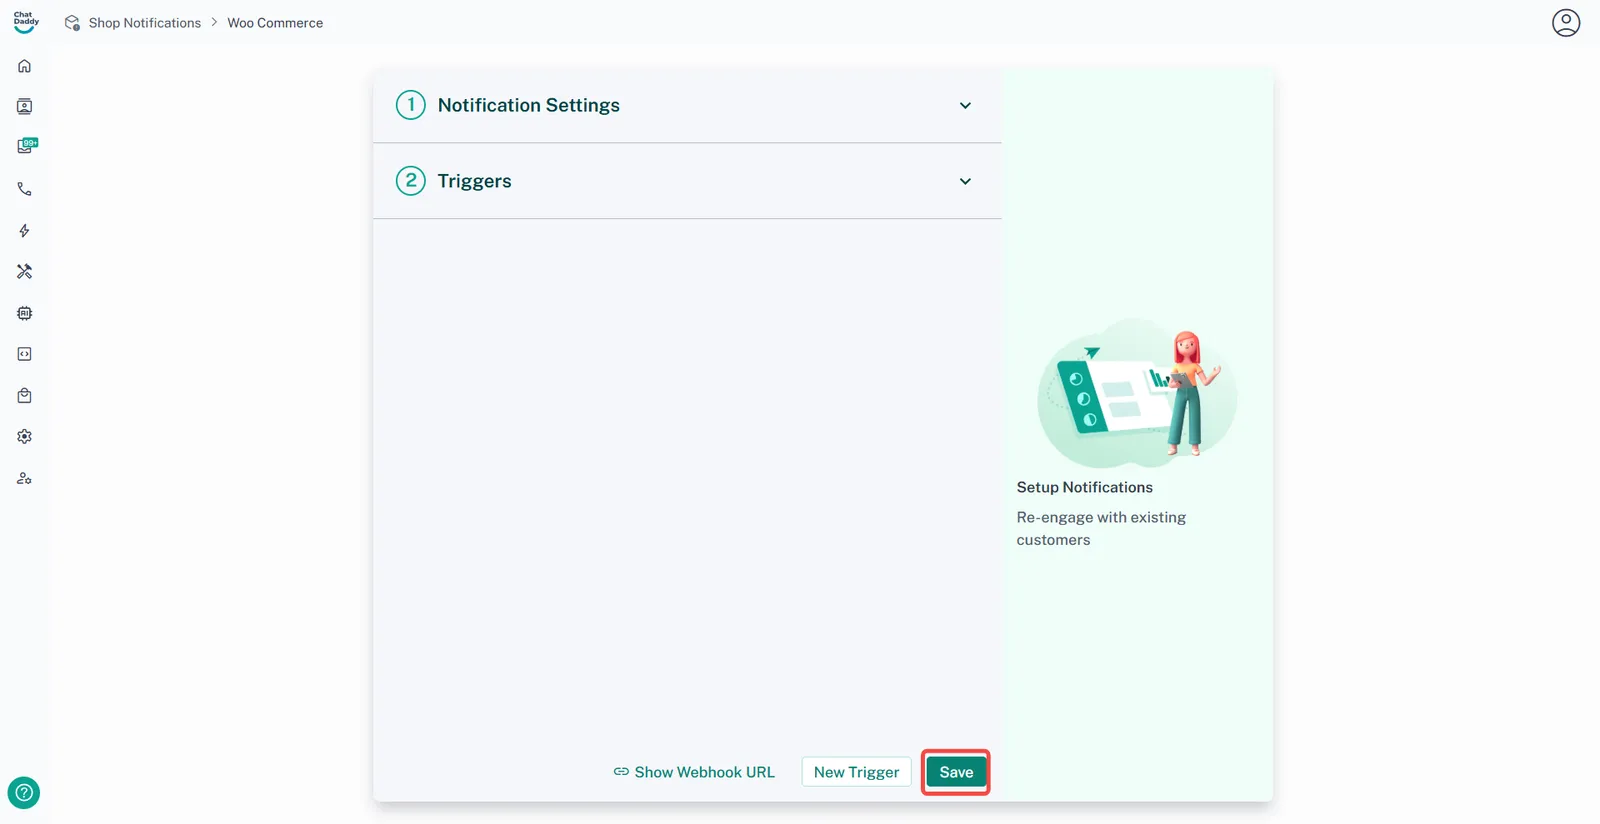
After checking for all triggers, click Save and integration is successfully installed!
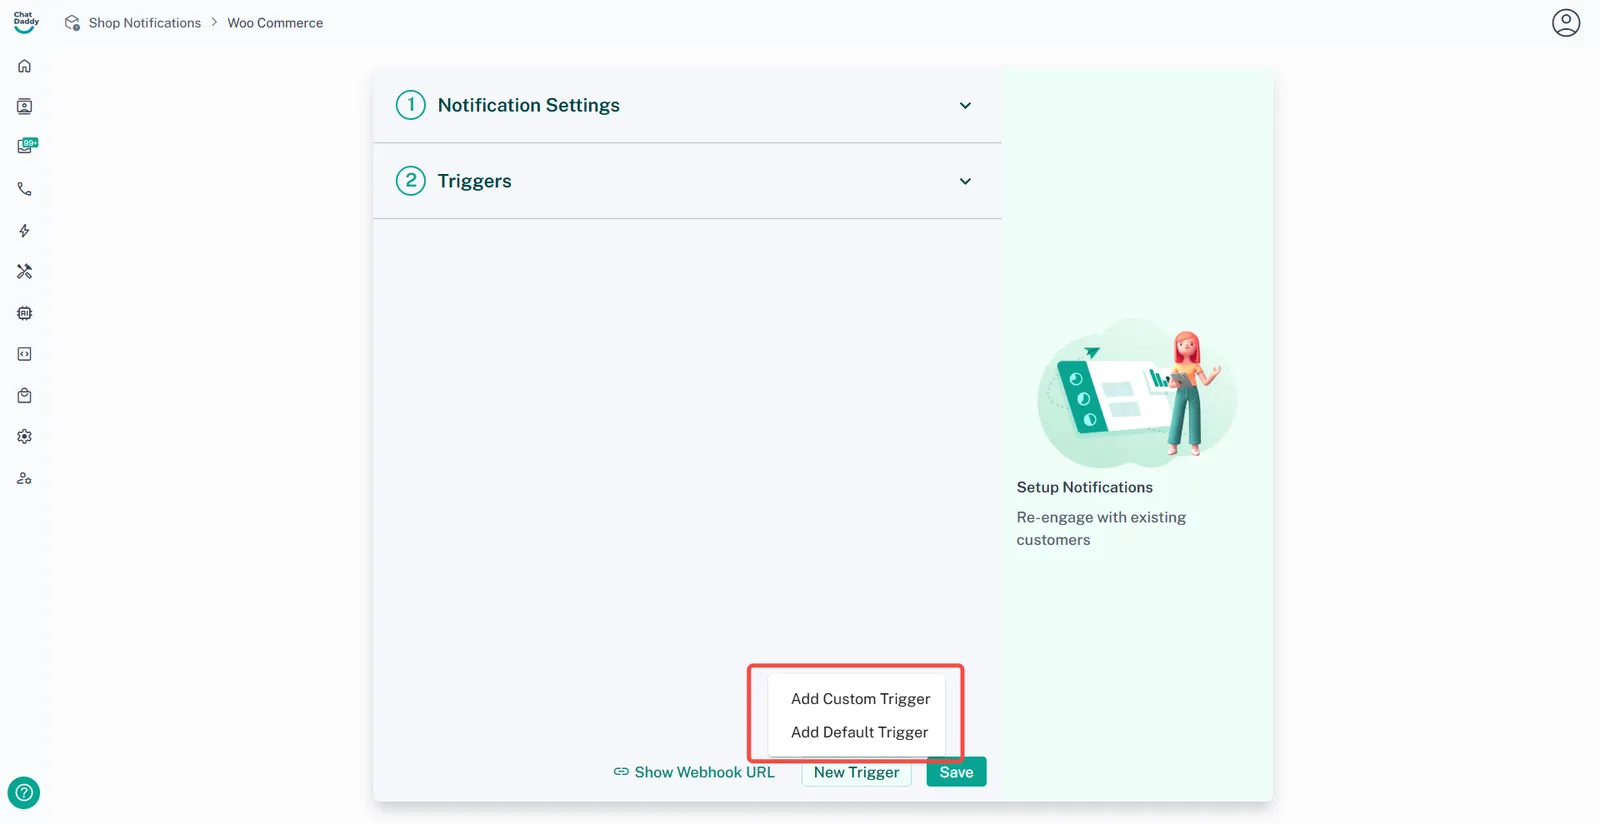
What are all these buttons?
[Add Custom Trigger] - Used to self-design trigger with own message template and conditions.
[Add Default Trigger] - Used to add trigger message templates that are made by Chatdaddy.
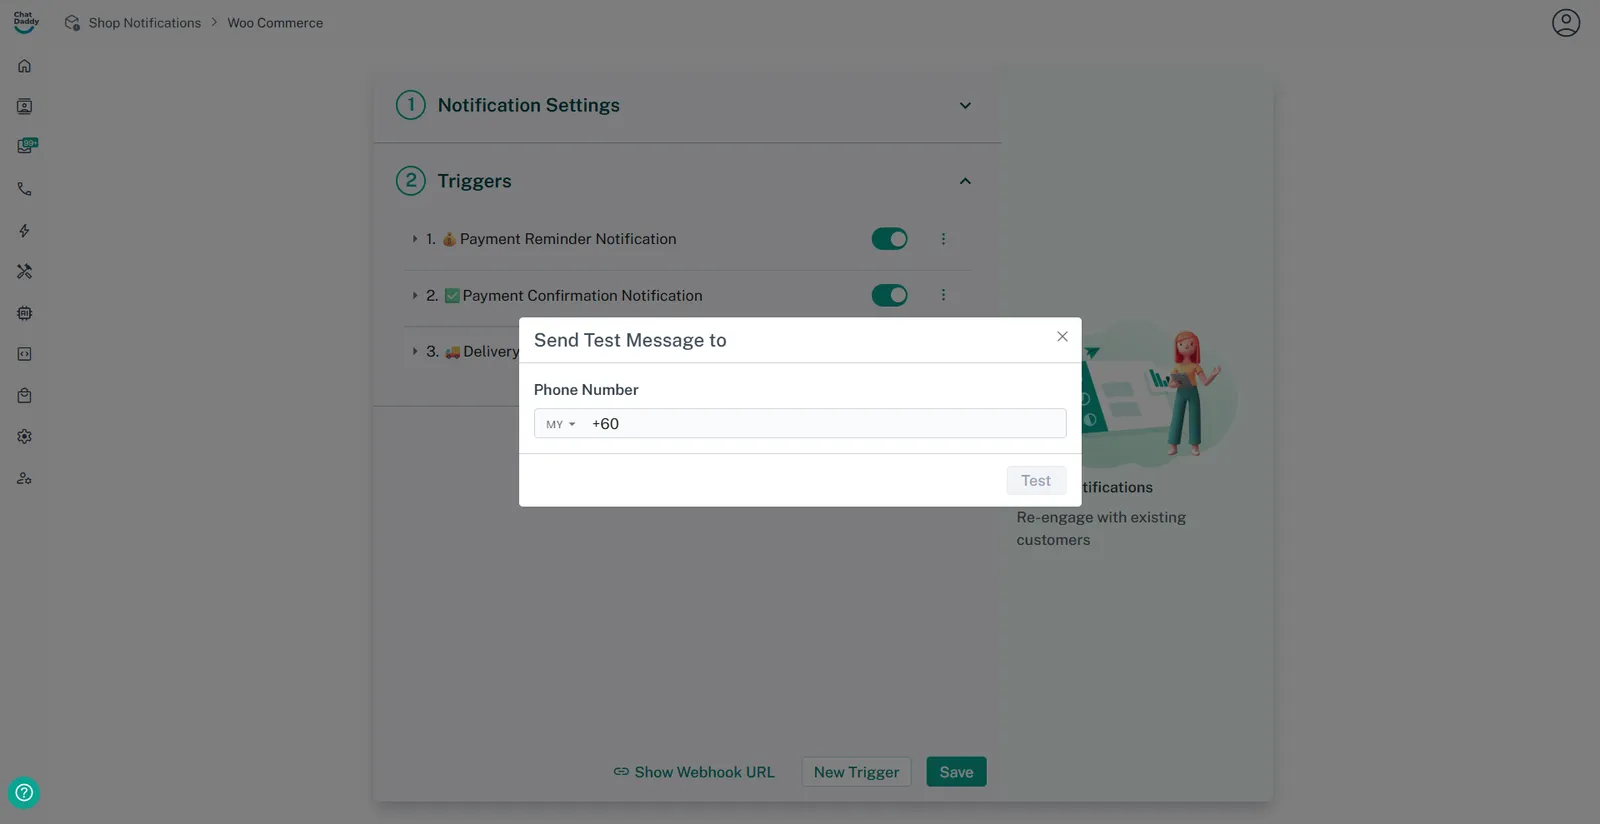
How to enable the testing mode
This is used to enable testing or send to a different receiver’s phone number.