Or follow these steps to create one from scratch
Step 1: Create a New Trigger - Go to your ChatDaddy automation > Message Flow. - Click "Trigger" > Create a new Facebook/Instagram Comment trigger. !Image Step 2: Add Conditions -…
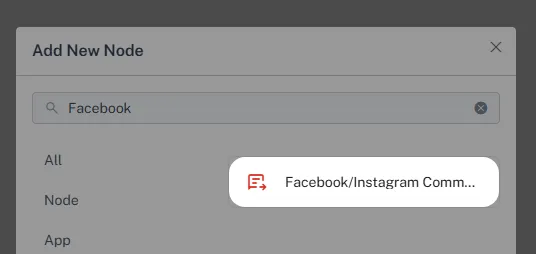
Step 1: Create a New Trigger
-
Go to your ChatDaddy automation > Message Flow.
-
Click "Trigger" > Create a new Facebook/Instagram Comment trigger.
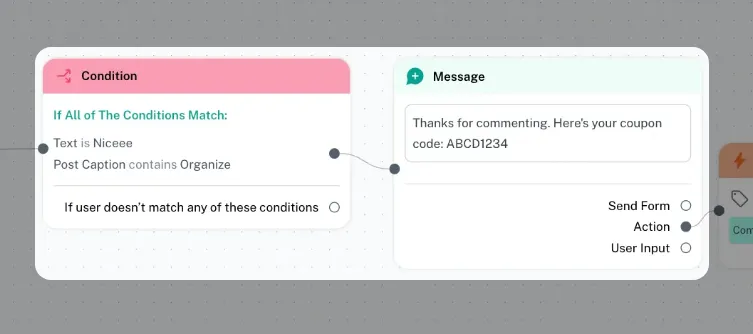
Step 2: Add Conditions
- Add a "Condition" node to your trigger.
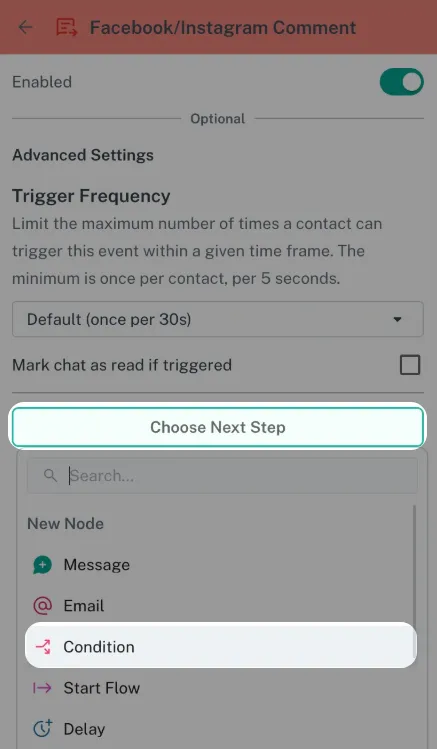
- Click "Add Condition" to see all available options. You can set conditions based on:
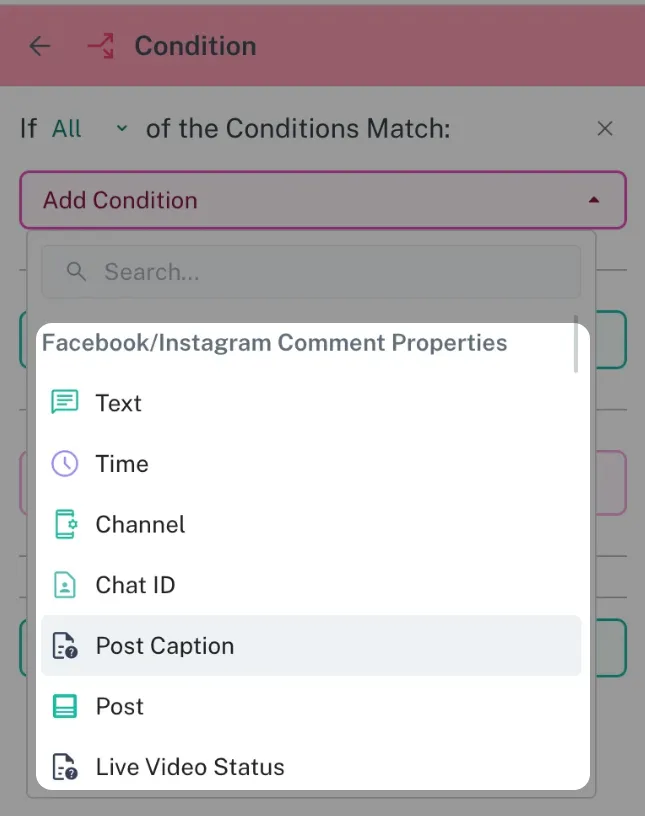
-
Text: The comment's content
-
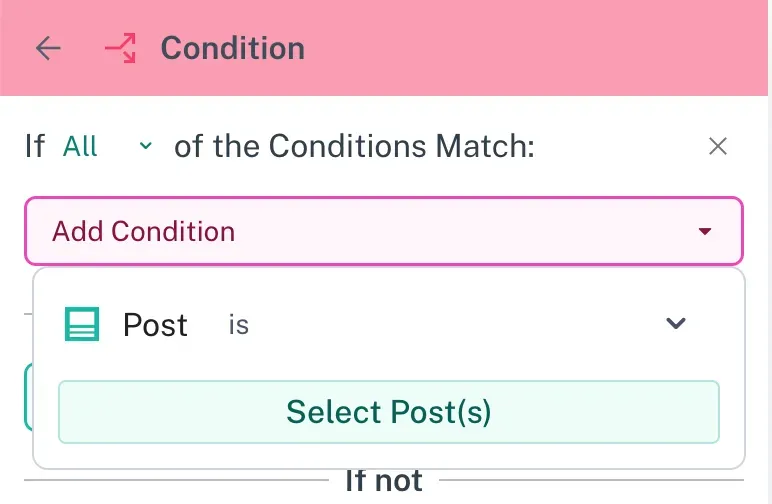
Post: A specific post you select
-
Post's caption
-
And more!
💡 Note: Example: Responding to "Nice" Comments on #engagement Posts
-
You want to automatically reply to anyone who comments "Nice" on posts with the hashtag #engagement.
-
Set a condition for "Text" contain "Nice".
-
Set a condition for "Post Caption" to contain "#engagement".
-
You can also add an action to automatically add a tag (like "Comment") to these users.
Step 3: Choose Next Step and Send a Message to the Customer
-
After setting your conditions, decide what message to send.
-
Add a "Send Message" action.
-
Write the message you want to send as a private reply (DM) to the user.
-
You can customize the message based on the condition that triggered the automation.
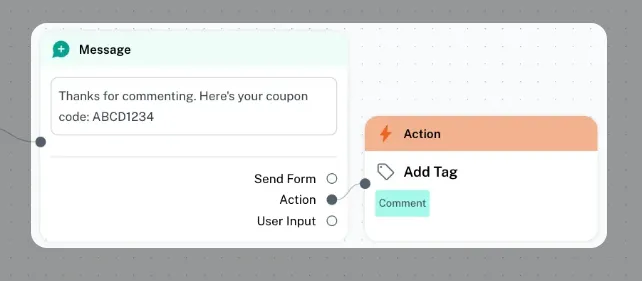
Optional Step 4: Adding Automation (Examples: Adding a Tag)
-
Beyond simply sending a message, you can automate other actions.
-
For example, you can add a tag to users who trigger the automation.
-
Add an "Add Tag" action.
-
Choose or create a tag (e.g., "Comment").
-
This helps you track who commented on your posts and segment your audience.
-
What Happens Next?
When someone comments and meets your trigger conditions, ChatDaddy will automatically send your reply as a private message (DM).